Thursday, March 29, 2018

Anybody Organized Challenged? Deflecto to the Rescue!


Spring is here!  Time to get organized!


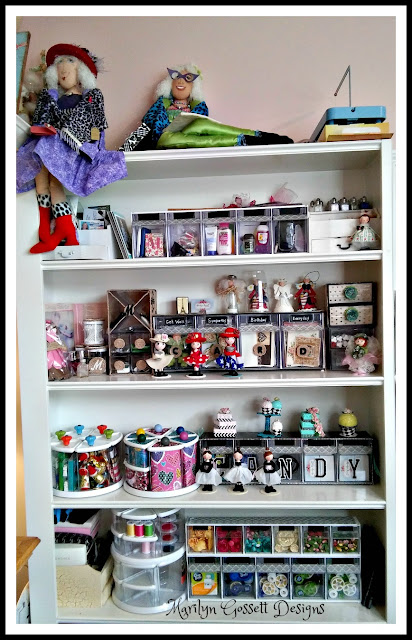
I am building my storage over time.  Your personal storage can be built around your shelving or attached to the wall.  There are brackets to hang the multi-bin storage to give you more space.  My studio is full to the brim and it will take me time to get everything under control!  I love my Deflecto storage for getting my supplies organized!

For getting your Spring cleaning started you will need:
  • Deflecto Interlocking Multi-Bin Storage Organizer:  5 Bin Unit #20503CR; 6 Bin Unit #20603CR
  • Deflecto Sign Tags with chalk pen #899112RT
  • Washi Tape:  black and white, 1" wide
  • Scissors    

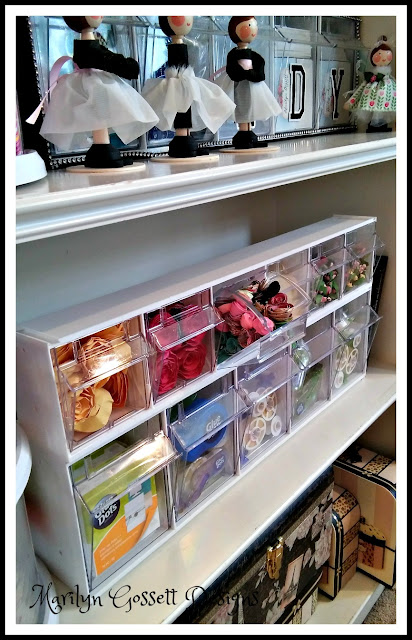
Before

1.  Unwrap the interlocking bins.  Follow the instructions and attach one bin to the other.

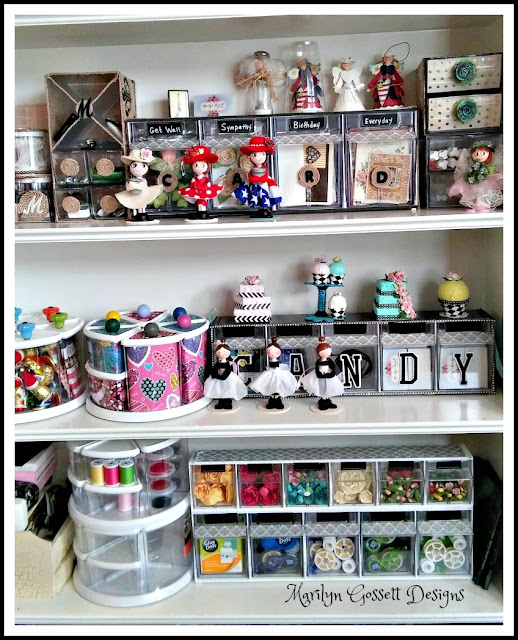
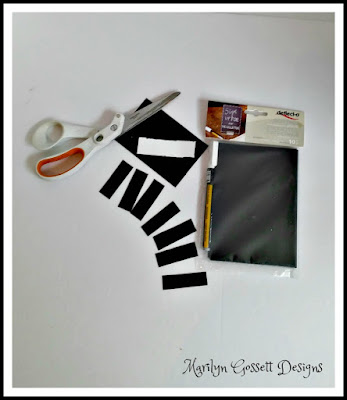
2.  Use a white label that comes with the bins to create the black labels that can be written on with the chalk pen.  How?  Measure and mark on one black sign tag the size of tag you will need.  Cut out using a sturdy craft scissor.  Slide into the slot on the front of the bin.  Use the chalk pen to write on the black label that you made.  Repeat for each bin. *Note:  Look closely at the bottom photos and you can see my chalkboard labels.  I haven't written on them yet.

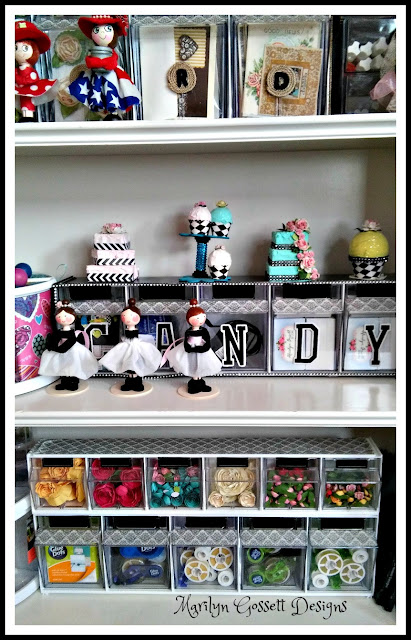
3.  Apply the washi tape in rows to the white top surface of the top unit.  Refer to the photo given below and apply tape to the ridge at the top of each bin.  Fold under or trim excess tape.

4.  Repeat for the bins on the bottom row of storage.  
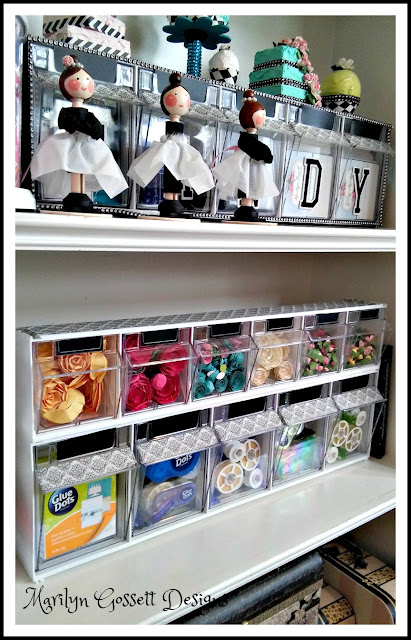
After


You can find Deflecto products at Amazon and at most major craft stores.

Happy Organizing!


Monday, March 26, 2018

Personalize a Step Stool and more!


Hi friends!  I am learning how to use adhesive vinyl sheets. Personalizing and decorating  multiple surfaces is fun!  

I am using the polished metal vinyl by Styletech Craft.  They have many exciting vinyls and a color for every kind of project!

Today I decided to personalize my studio step stool. This item has had a way of growing legs and walking away.  There won't be any doubts now about who it belongs to and where it should reside!  I could probably have stopped after applying the word "studio", but I wanted to do more!

Read on and I will tell you how I did it!


Materials I used:

Tape Technologies (Styletech Crafts) Vinyl:  Ruby #435HM; Silver #493HM
Step Stool:  Collapsible black step stool with white polka dots on top
Transfer Tape
Pick Tool: For weeding vinyl
Scissors
Die-cut Machine
Dies or download:  Fonts for alphabet letters
Rubbing alcohol
Cotton balls


Instructions:

1.  Gather the supplies.  Check the width and height of the area you are applying vinyl to.  Make sure your cut vinyl will fit in the chosen area.  Wipe the surface clean with rubbing alcohol using the cotton ball.  It doesn't hurt to pre-cut your letters on regular paper to make sure you are getting the correct size before cutting your vinyl.


2.  Cut a piece of transfer tape to fit over the top (right side) of the vinyl.  Smooth the transfer tape over the vinyl.  Use the Pick Tool to weed the release paper and vinyl away from the main design. There are many videos online if you have not done this step before.  After you weed the unwanted vinyl, you will place the sticky side down on the prepared surface and smooth it in place.  Remove any air bubbles and carefully remove the transfer paper. Your beautiful design should be revealed.


 I hope you got some inspiration here today.  This is what I would consider a beginners project.  This craft can be addictive so be warned!

BONUS!

In the spirit of Valentine's Day, here is another idea!  A bottle decorated with vinyl!


Make sure to take time to enjoy the small blessings along the way and;

Live Life with a Flourish!

Marilyn


I have rec'd complimentary product in exchange
for sharing my creativity on this blog.


Wednesday, March 21, 2018

Baby's Nap Time Sign....Shhhhh......


Materials:

Joy Embroidered Letters:  Baby Monogram Letters & Numbers, brown; Iron-On Embroidered 1", black
cardstock:  12" corrugated, black, one; 12" green leafy pattern, one; 8-1/2" x 11" kraft, one
unfinished wood:  Heart - 8"
painted wood cut-outs:  Elephant, Sun & Cloud
wire
wire cutters
needle nose pliers
drill
scissors
inkpad:  Brown
wedge sponge
glue
pencil
decoupage medium (Mod Podge matt)
sponge brush or paint brush
iron and pressing cloth


**  Follow the manufacturer's directions to apply the letters to the paper & wood surfaces as shown below.


Directions:

1.  Lay the right side of the wooden heart on the wrong side of the leaf patterned paper.  Trace around the heart with the pencil.  Cut out the heart.

2.  Apply the decoupage medium to the surface of the right side of the wooden heart using the paintbrush or sponge brush.  Apply the wrong side of the patterned paper to the heart, matching the edges.  Smooth any air bubbles from under the paper.

3.  Lay the wrong side of the heart over the corrugated paper.  Trace around the heart.  Cut out leaving a 3/8" border of the black paper.  Glue the wooden heart to the corrugated heart.  Allow glues to dry thoroughly.

4. Refer to photo and cut out kraft paper for the words SHH and TIP-TOE.  Follow the instructions given and adhere the letters to the paper by using a pressing cloth and iron. Use the inkpad and sponge to chalk the edges of the paper. Adhere the baby letters to the cloud of the painted sun & cloud cut-out.

5.  Adhere the elephant and sun & cloud cut-outs to a scrap piece of the black corrugated paper.  Cut out around each wood shape leaving about a 1/4" border.

6.  Adhere the cut-outs and words to the surface of the wooden heart as shown.

7.  Finish:  Drill a hole in the top sides of the heart.  (Make sure the holes are even.)  Cut a 12" piece of wire.  Bend a spiral in one end of the wire.  Put the opposite end through the hole in the left hand corner of the front of the heart. Bring the opposite end through the opposite side; back to front.  Trim off excess wire.  Bend a spiral in the end to secure.

Hang on the wall or use on the door of sleeping child.  There are many pre-painted cut-outs to be found at your local craft store.  You can choose themes and papers to suit your personal preference!

Hope you got some inspiration here today!  

Make sure to take the time to enjoy the small blessings along the way and

Live Life with a Flourish!

Marilyn


Thursday, March 1, 2018

Home Decor with Styletech Craft Vinyl

Do you enjoy treasure hunting at discount stores?  I sure do!  Especially when I can turn my finds into  beautiful and useful home decor.  I found some clear glass pieces and turned them into some decor that can be used as a vase, illumination, or both! Read on and I will show you how I did it!


Sources for Styletech Craft Vinyl:  

st- ATSM Craft your contact will be Peggy Suddath. Website is www. ATSM CRAFT she services FL, GA, SC, MS, AL.
Next we have Denver Sign Supply they service the westcoast. Contact number 225-654-3693 website: www.Vinyl&Crafts.com
Lastly we have Mid South Crafting they service the east coast. Their website is www.midsouthcrafting.com 615-462-5918


St. Patty's Day Decor with Deflecto

It is hard to get by St. Patty's Day without getting at least a pinch!  It is an often overlooked opportunity to create some fun!  I enjoy having a special dinner for the family or a party style lunch for my friends.  Deflecto products offer endless possibilities for decorating for any event or holiday.  Read on and I will tell you about my ideas.


Materials:

Deflecto:  Stackable Storage Cube, Standard, 6" x 6" x 6" #350401CR; Supergrip Sign Holder #20002CR; Clear Frame, 4" x 6" #597501CR
Cardstock:  white, green, black, Kraft
Vinyl adhesive film:  apple green, polished metal, 12" sheet
Die Cut Machine
Die or punch:  heart, 1", 2"
6" green scalloped circle
3" kraft scalloped circles
2-3/4" x 3-1/4"prints with a St. Patty's Day saying (I found a print on the internet)
3" x 3-1/2" rectangle of green cardstock (for border)
St. Patty's Day sign print-out; 4" x 6"
Rhinestones
Plastic gold coins
Anything else to make your party a success!


Directions:

1.  Find a St. Patty's print on the internet, size it to 4" x 6" and print out on white cardstock.  Trim excess paper and slide between the panels of the frame.  Cut a 6" scalloped circle and set/adhere the frame to the circle.

2.  Vinyl:  Cut out 1" hearts.  You will need four hearts for each clover.  Save scraps to cut the stems from.  Peel the release paper from the back of one vinyl heart and adhere to the frame.  Repeat with three more hearts to complete each clover.  Cut a stem from a scrap and adhere it to the clover as shown.  Make sure to place them exactly where you want them.


3.  Center and adhere the printed saying to the slightly larger green rectangle to create a border. Place the rectangle into the sign holder. 

4.  Cut out 3" scalloped circles from Kraft paper.  Remove the release paper from the sign holder, center and adhere to one Kraft circle.  Repeat for how-ever many you are making.


5.  Cut more hearts from the green vinyl, slightly larger or smaller for each clover, depending on the size you want it to be.  Adhere "clovers" to the Cube Organizer as shown.  Adhere a rhinestone to the center of each clover.

6. Bonus idea:   I used the vinyl hearts to decorate small Kraft paper bags with clovers.  I create 3-D paper decorations and I made the leprechauns to use as bag closures.  I sell these in my Etsy shop at PriMarilynly Paper.

Add some festive tableware and some good food and all you need is something green to drink and lots of good company!  I hope you found some inspiration here today and enjoy St. Patty's Day!

Make sure to take the time to enjoy the small blessings along the way and,

Live Life with a Flourish!

Marilyn