Tuesday, April 18, 2017

I love Rinea Foil Paper for altering paper mache' and wood!

Hi everybody!  Spring has arrived with all of it's color!  I am inspired to put spots of color around the house and to make gifts for family and friends.  Here are some ideas to perk things up a bit!


For some more project ideas using Rinea Foil Paper, check out the blog links below!

The link above will be available the last week of April!  Thanks!


Rinea Foil Paper - Spring Garland


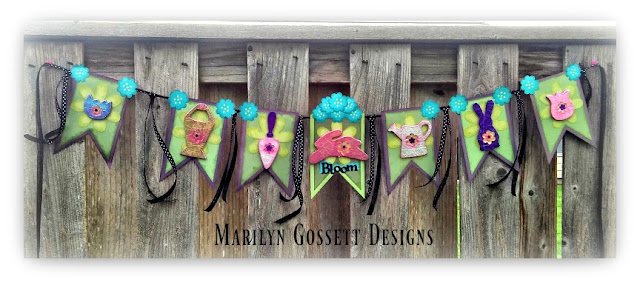
Spring has sprung!  The green is making a comeback and this is my favorite time of year!  Rinea Foil Paper has many uses.  I chose to use the brilliant colored foil paper on some wood shapes to embellish my Spring garland.  I will be using this for Easter decorating and beyond!

You will need:

Rinea Foil Paper:  Teal, Gold, Pink, Silver, Purple
Wood:  Spring shapes (7)
Cardstock:  purple, green, light green, teal
Ink Pads:  green, pink, purple, teal
Applicator:  wedge sponges or other
Ribbon:  1/4" black with white polka dots (6 yards)
Adhesives:  Dimensional Magic medium; Glue Dots
Hangers:  sign and banner hangers (deflecto)
Electronic die cut machine
Dies:  pennant, flower
Scissors


Each pennant is about 5" x 7".  I framed each green pennant with a purple pennant making a 1/2" border around the green.  I cut a lighter colored green flower for each pennant.  The layers are adhered together and finished with a foiled wooden shape on top of the flower.
I used the electronic die cut machine to cut out the teal flowers and the word Bloom.


Click on the links given below for some more projects!


I receive complimentary product
in exchange for sharing my creativity on
this blog.


Monday, April 17, 2017

Flower embellishments for gifts, home decor and more!

Make beautiful flowers with Rinea Foil Papers!  I will show you how!


Supplies:

Rinea Foil Paper:   Shop here:  http://www.rinea.com/store.html
Deflecto:  12 x 12" Frame, X-Divider Cube Storage
Washi Tape:  1" metallic gold & white chevron
Cling Vinyl:  Black by Cricut
Wrapping paper:  Polka Dots (any paper can be used)
scissors
adhesives
personal electronic die cutting machine


Copy & paste the pattern given below and open in a word document.  There are no borders on the page.
Print out pattern and cut out the pieces.  Trace around the pattern pieces onto the Rinea papers.  Cut out.
Adhere the larger petals to the flower base along the outside edges.  Repeat with smaller petals working toward the middle of the flower.  Cut out leaves and adhere to the back of the flower.

Punch one 2" circle from the Rinea foil paper.  Cut into a spiral leaving a circle in the middle.  Curl the spiral from one side, forming a rose shape.  Adhere the flower to the circle that is now the base of the flower.  Glue this to the center of the Flower Base.


I hope you are taking away some inspiration from this blog today.  Rinea Foil Papers are versatile and so fun to use.  They add a festive touch to many projects, be it home decor or paper crafts!  Thanks for stopping by!

Take time to enjoy the small blessings along the way, and
Live Life with a Flourish!

Marilyn


I accept complementary product in exchange
for my creativity on this blog.

Wednesday, April 5, 2017

Interchangeable Seasonal Signage - first up is Easter!

April is here and though it is late this year, we are hopping into Easter!  I love Easter!  A day to celebrate with family and friends; and colorful decorations make it extra special. I have a 12" acrylic frame that works beautifully as signage for each season. I will tell you below how I made it!


Supplies:

Deflecto Frame:  clear 12" x 12"; #69991CR
Rinea Foil Papers:  Crafters' Rolls  Link:  http://www.rinea.com/store/p15/CraftersRolls.html
Cardstock:  heavy white
Punches:  circles; ovals, flowers
Washi Tape:
Vinyl:  shiny black by Cricut
Glue Dots
Dimensional Magic: clear
scissors
Wrapping paper:  12" square of polka dots with white background.  (any memory paper)
Electronic die cut machine

Instructions:

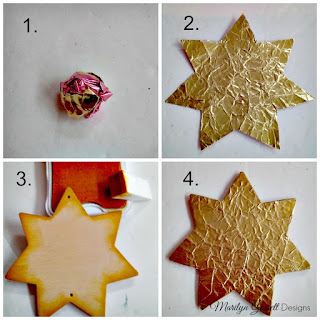
For the crumpled metal effect:  See photo instructions below.  Carefully wad up the paper then smoothly and gently spread it out flat again.  Adhere the shape to either a wooden shape or to a paper shape. Use an inkpad to chalk the edges.


The frame is decorated with washi tape; a cling vinyl sentiment (cut from die cutting machine), and embellishments are made from cardstock and Rinea Foil Papers. Everything is removeable and the frame can be reused for another occasion.  Use the embellishments for decorating baskets, candy bars, etc.!  Enjoy!

I hope you got some inspiration here today and have a very happy Easter!


Take time to enjoy the small blessings along the way and,

Live Life with a Flourish!

Marilyn


I receive complimentary product in exchange
for my creativity on this blog.


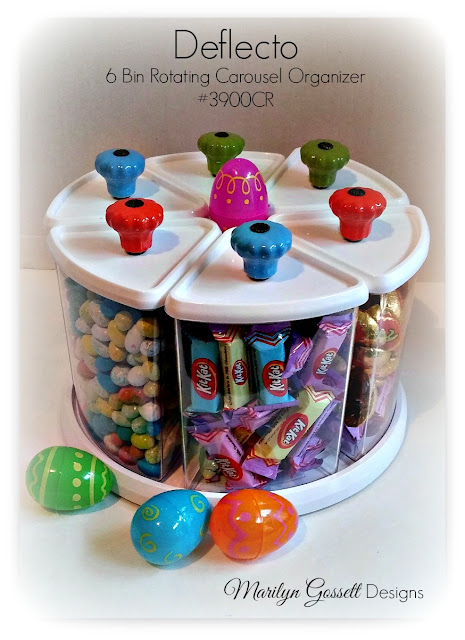
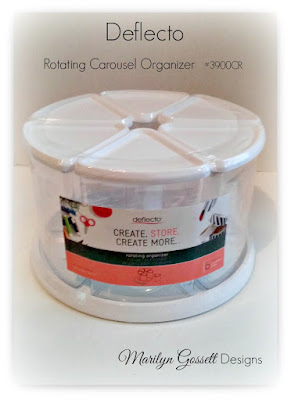
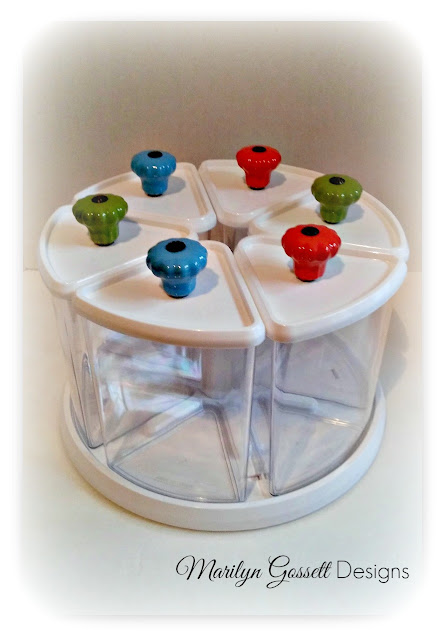
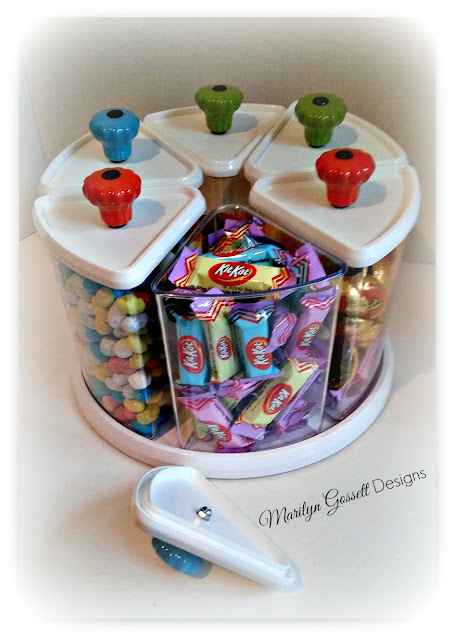
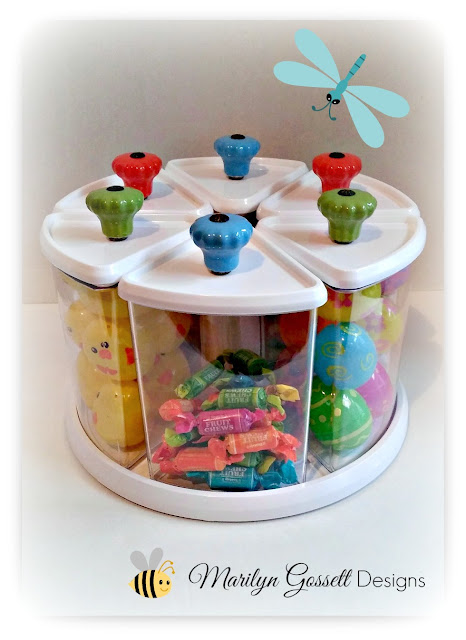
Organize your Easter with a Deflecto Storage Carousel Organizer!

Do you like the decorative knobs that are in all the stores these days?  They come in all shapes, sizes and colors.  I found some ceramic knobs that I really liked and attached them to the top lids of my Deflecto storage bins. The bins on the carousel can be used for many different things.  Easter is this month so I used this carousel for Easter candies and eggs. 


If you decide to add some knobs to your storage you will need a few things to start:

1.  Drill with a drill bit to match the size of the screw on your acrylic knob
2.  Nut and washers to tighten the knob to the bin
3.  Screwdriver to tighten the screw
4.  A thick book or magazine (I used an old phone book) to drill on
5.  6 decorative knobs with screws  (I chose ceramic knobs)


Directions:

1.  Mark the spot on one lid for knob placement.  Place the lid on top of the thick book.  It might help to have someone help to hold the lid steady for drilling.  Choose the drill bit that matches the size of the screw on the knob.  Drill the hole.  Repeat for each of the lids that you will be attaching knobs to.

2.  Attach a knob to one lid.  Tighten the fit using nut and washers.  Check the size of the screw to make sure it is the right size.  Repeat for each lid.

3.  Fill the bins; replace the lids and enjoy!


I hope you got some inspiration here today! 

Take time to enjoy the small blessings along the way and

Live Life with a Flourish!

Marilyn


I receive complimentary product
in exchange for my creativity on
this blog.


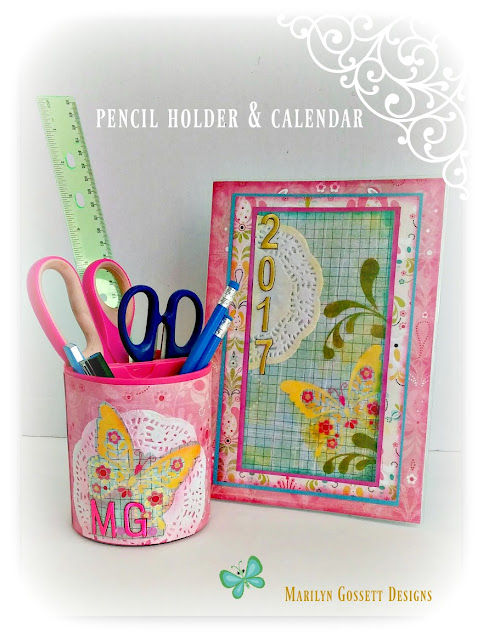
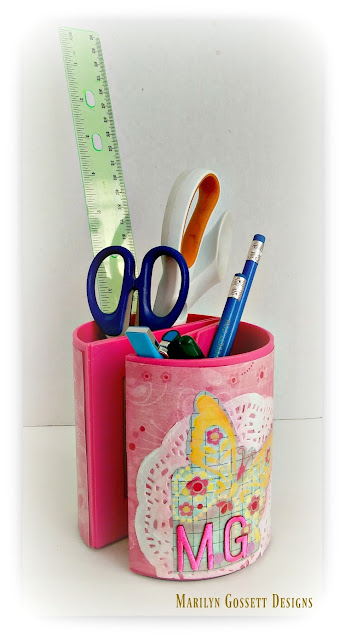
Monogrammed Desk Essentials

\
Personalize a Deflecto Pencil Cup to pretty up your workspace!  I layered some pretty papers with a paper doily and added some embroidered initials.  Close to your heart pictures will make it even more special.  Check out the built-in photo frames on the inside!
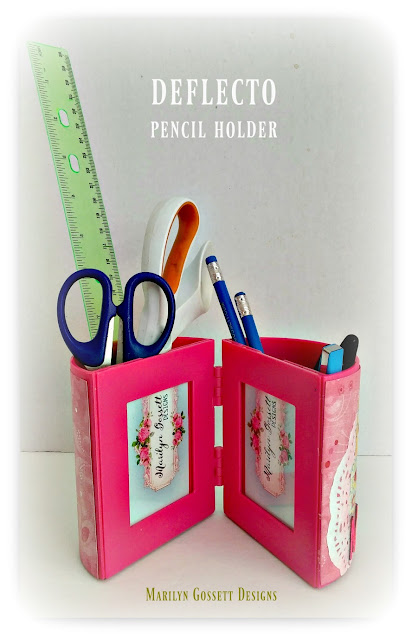
Pencil Cup w/Photo Frames

I cut pieces from the memory papers to carry the Spring theme.  Cut paper to fit the outside of the pencil caddy.  Adhere.  Trim a paper doily and an image from the memory paper.  Chalk the edges using an inkpad and sponge.  The embroidered letters were white and I sponged them with permanent ink to add the color I wanted.

I put some of my pretty business cards in the frames so that I would have some close at hand. 

This is a quick and easy project and brings a pop of Spring into your space.  Kids love the possibilities for decorating their personal pencil caddy too!  I will be posting a separate blog with instructions for the calendar!


Take time to enjoy the small blessings along the way and

Live Life with a Flourish!

Marilyn


I receive complimentary product in
exchange for my creativity on this blog.