Thursday, November 30, 2017

"Believe" Shadow Box - Christmas Decor


The holidays are upon us!  I have had a shadowbox frame in my stash for a long time  I decided to take it out and turn it into some Christmas decor this year.  The project I came up with is very quick and easy and looks magical!  Read on to see just what I did.....
You will need:

Styletechcraft Vinyl:  Polished Metal, Red
Transfer paper
Weeding tool
Shadow box: 8" x 10"; (I painted mine black)
Sisal trees
Memory paper and embellishments
Glitter:  white
Glue
Paper trimmer
Die-cut machine
Directions:

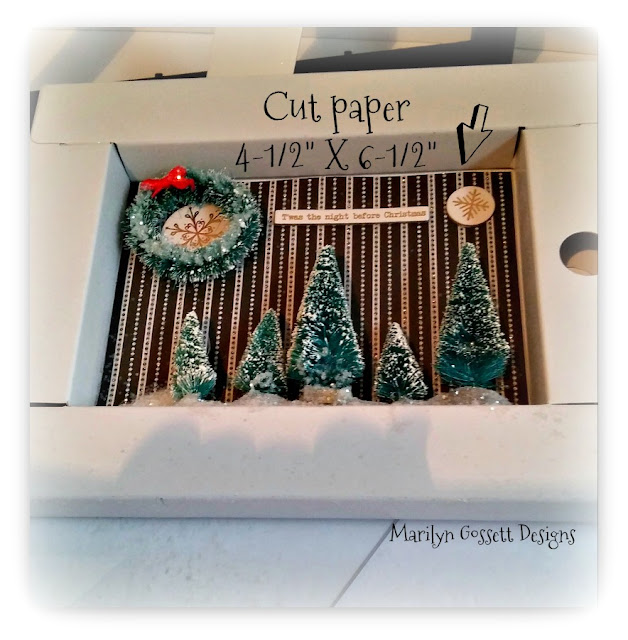
1.  Take the shadow box apart.  Make sure the glass is clean.  Paint the frame if desired.

2.  Cut the memory paper to fit in the back of the shadowbox frame.  Adhere.

3.  Glue the sisal trees to the bottom of the shadow box.  Sprinkle generously with glitter.  Remove most of the excess, but leave some for effect. Adhere the wreath and small embellishments to the memory paper.

4.  Cut out the word Believe on the die-cut machine.  I set the size at 1" which is the height.  Apply the transfer paper and pick out the part of the design you won't be using.  This is called "weeding".
Adhere the sentiment to the inner frame as shown. Remove the transfer paper.
5.  Replace all of the layers of the frame.  Box, inner frame, glass and top frame.  Now it is ready to show off!

Thank you for taking time for the blog today.  I hope you are inspired to go forth and create your own special holiday decor!

Make sure to take the time to enjoy the small blessings along the way and

Live Life with a Flourish!

Marilyn


I receive complimentary product in exchange
for my creativity on this blog.

DIY Snow Globe with etchall(R)


Have you ever tried etching?  I have a project idea to share with you today.  I used a recycled jar, some craft mirrors, glue and glitter and created a DIY snow globe.  I used some small sisal trees but you can use any miniatures that you would like to put in your snow globe.  Read on to see how!

******Follow this link to watch a video of Barbee explaining how to use etchall(R)

Materials you will need:

etchall(R): 16 oz.  dip'n etch
etchall (R):etchmask
etchall (R) squeegee
tacky glue
white glitter
sisal trees (any other minis you want for your globe)
3" foam ball - halved
craft mirrors:  1/2" square, 2-1/2" round
trim:  1/2" silver
recycled plastic bottle or container with the top cut off.  (slightly larger than the jar)
scrap paper
scissors
adhesive vinyl:  red
die-cut machine:  cut the word "Believe"
marbles or rocks (for weighting the jar)


Directions:

1.  Make sure your recycled jar is clean and sparkling! Don't forget the lid!
2.  Use the die-cut machine to cut a 3" wide oval.  
3.  Adhere the oval to the jar.  Use the Squeegee(R) to smooth out any air bubbles.  Remove the transfer paper and discard.
Now you are ready to etch!
4.  Add some marbles or rocks to the jar to give it some weight.  Sit it in the recycled plastic container.  Carefully pour the etchall(R) dip'n etch into the container.  As you can see in the photo below, the liquid is very dark.  That is a natural process with this product that happens over time.  The product is still good!  Go ahead and use it and make sure to save it for another use after you have your etch!
5.  Set the timer for 15 minutes.  If you need to adjust the jar in the etching liquid you can leave it in longer.  When the time is up, remove the jar, remove the etchmask (discard), and wash thoroughly.  Return the dip'n etch liquid to it's original container for another use.
6.  Now comes the fun part!  Invert the jar and adhere a round craft mirror to the (now) top of the jar.  Adhere the smaller square mirrors around the sides as shown.  I used a jar that had little square indents around the top and bottom which worked great for placing the mirrors.  You could use large rhinestones for this step too.  Apply a line of glue around the un-etched oval on the jar.  Cover it with glitter.  Also apply glitter around the mirrors.  Careful not to get it too messy or your mirrors will slide off.
7.  Trim the foam to fit the inside of the lid allowing room for the jar to screw back on.  Adhere the foam to the lid.  Adhere the trees to the foam and sprinkle heavily with glitter.  Allow to dry.
8.  I used my die-cut machine to cut out "Believe" from a red vinyl adhesive sheet.  I used some transfer paper over the top of it and applied it to the jar as shown.  Once all the air bubbles are rubbed out; remove the transfer paper.

9.  Insert the trees into the jar; screw the lid in place.  Finish by adding some silver trim around the sides of the jar lid.  

10.  I showed a variation at the top of the page.  Let your imagination be your guide!  Using recycled jars of all sizes make great snow globes for decorations and gifts.

Make sure to take the time to enjoy the small blessings along the way and

Live Life with a Flourish!
Merry Christmas!

Marilyn


I received complimentary product for this
blog in exchange for my creativity,


Snowman Factory with Deflecto Stackable Caddy Organizer


December Greetings Friends!  As I write this blog, I am looking around at my stacks and piles of Christmas decorations as I finish up some projects and look forward to decorating the house.  Deflecto has come up with a Stackable Caddy storage system that is a favorite of everyone!  The caddys are made to Stack'N Go with a Caddy Wheel Base.  You can pile on as many as you desire for convenient storage.

I decided to dedicate one of my caddy's to a festive storage for the snowman ornaments I make for the holidays.  I put the foam balls, paints, paintbrushes and accessories in the storage bins for convenience when I work on this project. 

Read on, and I will tell you about how I decorated the caddy!


You will need:

Deflecto:  Stackable Caddy Organizer #29003CR
Paints:  Metallic Gold Acrylics    (Designer note:  Spray paint works great too)
Sponge:  I used a sea sponge
Paintbrushes
Vinyl with adhesive:  Metallic Gold and Clear Glitter
Die-cut machine
Water Bucket
Paper Plates
Paper Towels
Scissors
Paper Trimmer

Instructions:

1.  Remove all of the clear bins from the caddy.

2.  Pour out some paint on a paper plate.  Wet the sponge and squeeze out all of the moisture.  Use a pouncing motion to apply paint to the sponge and repeat that motion as you apply the paint to the caddy.  After applying a coat of paint to the caddy, apply a second coat where needed.  **  If you want a quicker way to do this......a metallic spray paint made for plastic will work great!
3.  The caddy should look about like this when you are finished painting.
4.  Stars:  Cut 1", 3/4" and 1/2" stars from the vinyl using the die-cut machine.  Start with about 20 of each size.  Peel off the release paper of one star and adhere to one bin.  Repeat; randomly placing the stars until you are happy with the way the bins look.  

5.  Cut 6 vinyl  rectangles at 2" x 2-1/2" using the paper trimmer.  Round off the corners with the scissors.  Remove the release paper from one rectangle, position and adhere to one of the indention's on the top of a bin.  Smooth out all of the air bubbles.  If you get a stubborn air bubble; use a pin to release any trapped air.  Smooth.  Repeat and finish the other indentations.  Below is a photo of how they should look when you are finished.
Below are a couple more photos of how my caddy looks now.  I love it and I am looking forward to finishing my snowman ornaments.  I will be adding some hangers and embellishments to make them look cozy and ready for the tree.


Thank you for stopping by the blog today.  I hope you got some inspiration here today and have a wonderful Christmas season!

Cheers!
Marilyn


Sunday, November 5, 2017

Decorate a Christmas serving plate and candle holder with Tape Technologies


Need some quick and easy ideas for the Holidays?  With the help of Tape Technologies vinyl I have created some Christmas decor that I am proud to show off!  Read on and I will tell you how I did it!
I purchased an inexpensive ivy bowl and picked up the platter at a second-hand store.  

You will also need:

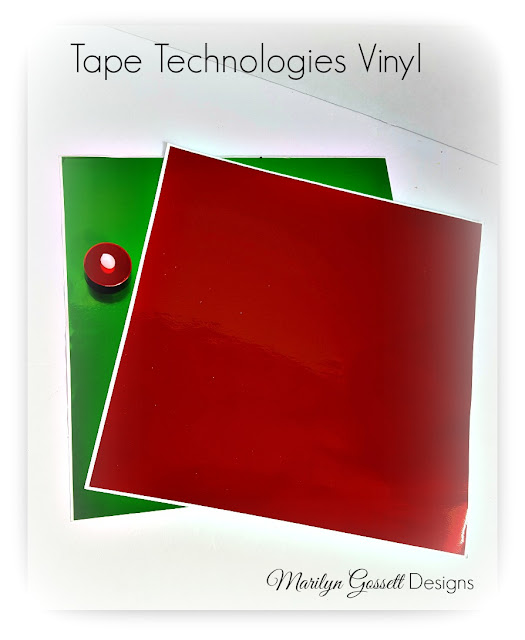
Tape Technologies vinyl:  Red and Green Polished Metal (Styletechcraft)
9" square opalescent plate with hobnail type trim  (or other similar find!)
Ivy bowl
Tea light'

Paper Trimmer
Die Cut machine


Instructions:

Clean and dry the glass thoroughly.

Cut 1/2" strips from the red vinyl with the paper trimmer.  Cut 1/2" increments from the 1/2" x 12" strip.  Set the 1/2" squares aside.

Remove the release paper from the back of one square.  Center and adhere to one corner of the platter. Repeat on the opposite side. Adhere a square next to the first square and repeat on each side; working towards the middle.  Repeat for the other 3 sides.

The plate should look like the photo below when you are finished.
Cut out holly leaves and berries using the die-cut machine.  If you don't have a die-cut machine, trace the pattern on the wrong side of the vinyl (on the release paper) and cut out. Remove the release paper, arrange and adhere the vinyl to the surface removing any air bubbles.  Place the tea light in the ivy bowl to finish.  You can further embellish the ivy bowl with a pretty bow around the neck if you like!

Thank you for stopping by the blog today.  Feel free to leave any questions or comments in the comment box below.  I like hearing from you!

Make sure to enjoy the small blessings along the way and,
Live Life with a Flourish!

Marilyn


*Note: You can find the Tape Technologies vinyl on Amazon under the name Styletechcrafts.

Enjoy!


I receive complimentary product
in exchange for my creativity on this blog.


Tuesday, October 31, 2017

Carousel Pumpkin Decor with Deflecto


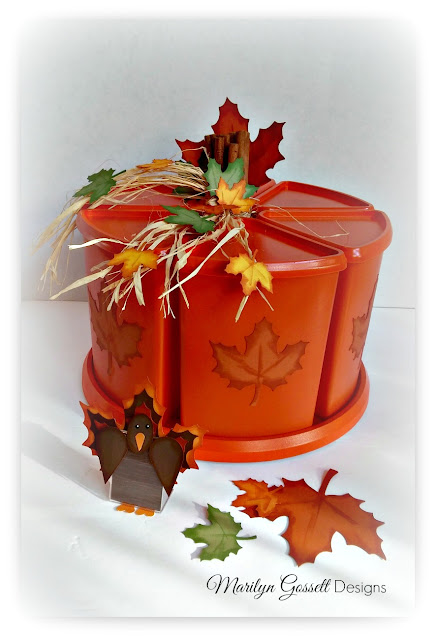
November is upon us!  The month to celebrate our many blessings with friends and family.  Deflecto provides us with many products to help us with our celebrations and feasts.  I used a Rotating Carousel Organizer to make a useful piece of decor to celebrate the season.  Read on and I will show you how!


You will need:

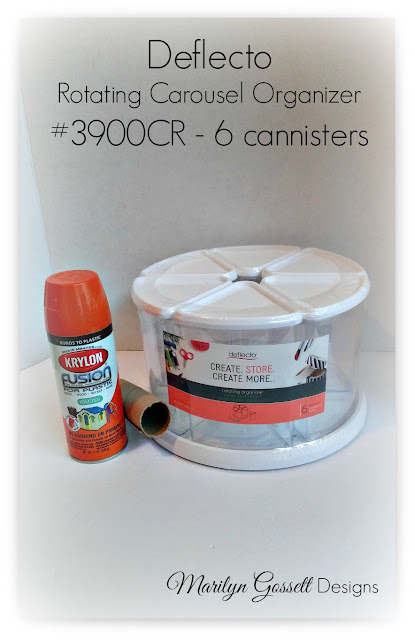
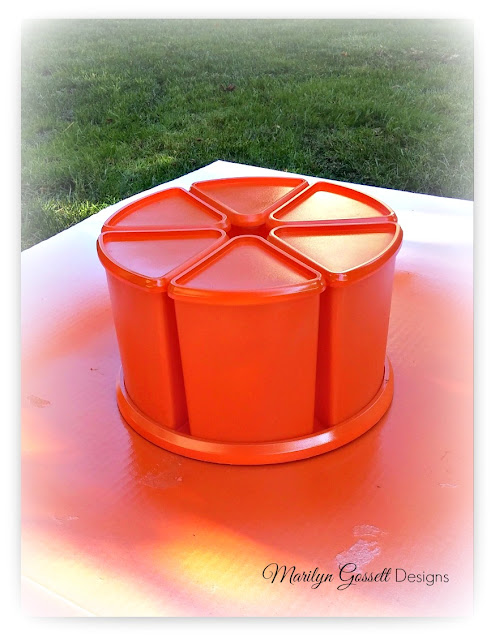
Deflecto:  Rotating Carousel Organizer #3900CR 6 canisters
Spray Paint:  Krylon Fusion for Plastic, Orange
Cinnamon Sticks
Cardstock:  Green, Orange, Dk. Yellow
Inkpads:  Orange, Green,  Brown
Wedge Sponges
Raffia
Craft Glue
Scissors
Die cut machine for cutting leaves

Instructions:

1.  Follow the instructions given on the paint can and paint the canisters, lids and base.
Allow to dry thoroughly.
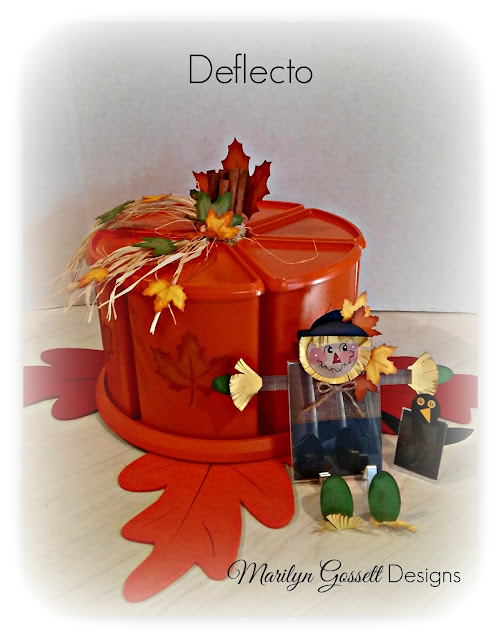
2.  Cut the leaves.  Ink the edges.  Apply craft glue to the wrong side of the leaf and adhere to the front of one canister.  Repeat for the other canisters.
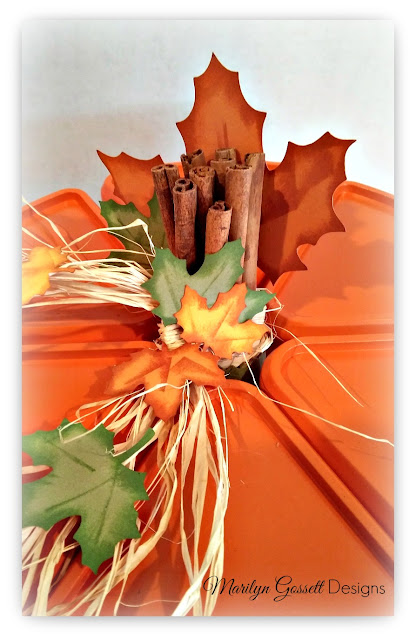
3.  Gather a bunch of the cinnamon sticks and secure with raffia.  Tie a knot to secure.  Trim raffia ends.  Place the cinnamon sticks in the top opening of the canisters.  Adhere the leaves to the cinnamon sticks and raffia as shown.  Take care to not get glue on the canister.

Here is the completed canister.  I used Deflecto mini sign holders to make the scarecrow and the crow.  The legs and arms are Deflecto Sign Danglers.

Hope you have a wonderful month of November!  Onward and forward to December! We will have much more to show you for Christmas!  Thank you for coming by! We welcome comments and questions.

Make sure to take the time to enjoy the small blessings along the way, and
Live Life with a Flourish!

Marilyn


I receive free product in exchange for
my creativity on this blog.


Sunday, October 22, 2017

Etch a Man Cave Masterpiece!


Welcome to the blog today!  I have a fun idea to share!  I don't know about you, but I love shopping at thrift stores to find treasures that I can up-cycle.  For the project shown below; I found an antique mirror with a heavy wooden frame.  I thought it would be perfect for a rustic piece of home decor and came up with this etched project.  

There are a few special supplies that you will need and they are listed below:


You will need: 

mirror with frame or something similar from thrift store  

etchall® Click on link here: etchall bee-ginner kit  

paper towels
access to water for rinsing


Instructions:

1.  If you are brand new to etching; I recommend you watch the how-to video by Barbee, the owner of etchall(R) here:  Instructional video by Barbee

2.  Clean the mirror and wipe clean.  Cut the design.  You will use the negative part of the stencil.

3. Apply the transfer paper to the vinyl.  Use the pick to weed the vinyl; taking out the part of the design that you won't need.  You will be weeding the parts that you want to etch; i.e. the mustache, letters and numbers.

4.  Line up the vinyl design on the glass; remove any air bubbles using the squeegee.  Remove the transfer paper once vinyl is smoothed onto the glass.

5.  Remove the lid from the etchall creme and pour over the stencil.  Gently smooth the creme over the entire design, it can be fairly thick.  Set the timer for 15 minutes.  When time is up; scoop the creme up and put it back into the jar.  It won't matter if the creme is turning shades of brown.  It is still good for another use!

6.  Carry the mirror to the sink and rinse off the excess creme.  Remove the vinyl and complete the cleaning.  Dry thoroughly.


7.  You now have a great piece of home decor!  I love the rustic quality of this piece and think it will go very nicely in a mountain cabin.  It is also a fun piece for the man cave!  Let your imagination guide you as you peruse the thrift stores. etchall(R) will turn any glass or mirrored surface into a masterpiece!  You can also etch on slate, china, and more!  Etching glass before painting also gives the paint something to grab onto!  

Hope you got some ideas here today and enjoy your own adventure with etchall(R).  There is a saying that I learned many years ago that I adhere to:  "Whatever the mind can conceive and perceive; it can achieve!!"  I love that!

Make sure to take the time to enjoy the small blessings along the way and;

Live Life with a Flourish!

Marilyn


I receive a small stipend for sharing 
my creativity on this blog.

Monday, October 16, 2017

"BOO" your friends with the gift of a deflecto organizer!!


Fall is upon us!  

Do you like to BOO your friends and neighbors?  I have the perfect treat!  This set of Interlocking Storage Organizers can be used for storing all kinds of supplies after the treats are gone.  It only takes a few supplies to convert one to the perfect treat container!
For this project I gathered just a few supplies.


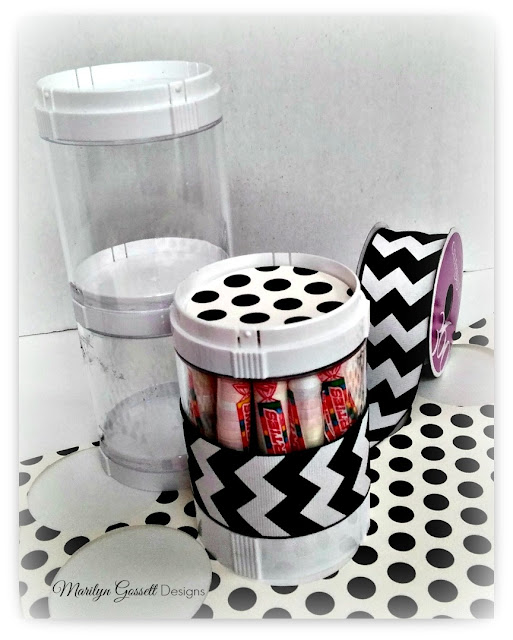
deflecto:  Interlocking Storage Organizer  20101CR
Ribbons:  1-1/2" black and white grosgrain; 3/8" orange polka dot grosgrain.
Cardstock Paper:  12" x 12" white with black polka dots
Die Cut:  2-1/2" Circle
Adhesives
Scissors
Candy
Misc. embellishments
Instructions:

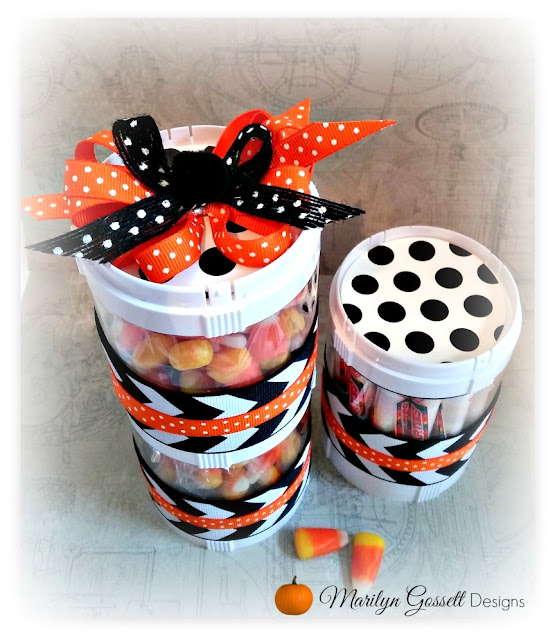
1. Cut the ribbon to fit around one container.  Overlap the ends and adhere.  Repeat for each container.  Layer the orange ribbon over the top of the black and white ribbon.

2.  Open the containers and adhere a polka dot circle to the top of each lid.

3.  Add candy or other treats to the containers and replace the lids.

4.  Make a loopy bow with the orange ribbon and adhere to the top of the cannister.

5.  Adhere additional desired embellishments.  (I adhered a black pom-pom to the top of the bow.)

6.  Now it is ready to "BOO" somebody!


Thanks for stopping by the blog.  Hope you got some inspiration here today.  I enjoy comments.  If you have a comment or question; please post it below.

Make sure to take time to enjoy the small blessings along the way and
Live Life with a Flourish!

Marilyn


I received complimentary product in exchange
for sharing my creativity on this blog.  :-)


Monday, October 9, 2017

Thanksgiving Signage made easy with deflecto!

Thanksgiving is just around the corner.  deflecto has a product to help with any and every aspect of holiday entertaining.  I used slanted sign holders and sign danglers to complete my beautiful signage created for my Thanksgiving dinner.  

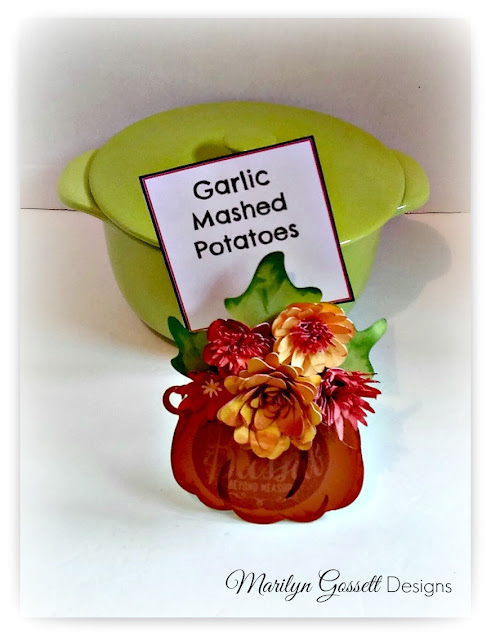
Sometimes it isn't what you see; but what you DON'T see that makes something great!  The first rule of craft designing is to not let the mechanics that are holding a design together, show!  I created my paper pumpkins and flowers using my electronic die-cut machine.  I stamped the sentiment on the front of the pumpkin with a rubber stamp that I like.  Here is what you will need:

Materials:

deflecto:  Mini Sign Holders, 2" x 3"  #20005CR
               Sign Danglers, #20014CR
Cardstock:  Terracotta, Orange, Red, Green, Yellow  (Fall colors); White
Inkpads:  Coordinating colors to cardstock 
Sponge Applicator
Die-cut Machine
Dies:  Pumpkin, Maple Leaf, Flowers
Rubber Stamp:  Blessed
Adhesives: 3-D Foam dots, Tacky Glue 
Computer and printer
Paper Trimmer


Instructions:

1.  Refer to the photos given.  Cut out the pumpkins (these are 4" wide x 3-1/2" high).  This will apply to whatever shape you cut out as your main shape.  The maple leaf is 4-1/2" wide x 5-1/2" high.

2.  Cut out the flowers.  The largest flower is 2" wide assembled, and the smallest is 1".  I used a die cut on the electronic machine.  For this step you could substitute mulberry or silk flowers purchased at the craft store.  

3.  Adhere the leaf to the back side of the pumpkin with the top half of the leaf extending above the top of the pumpkin.  Arrange and adhere the flowers to the pumpkin as shown.

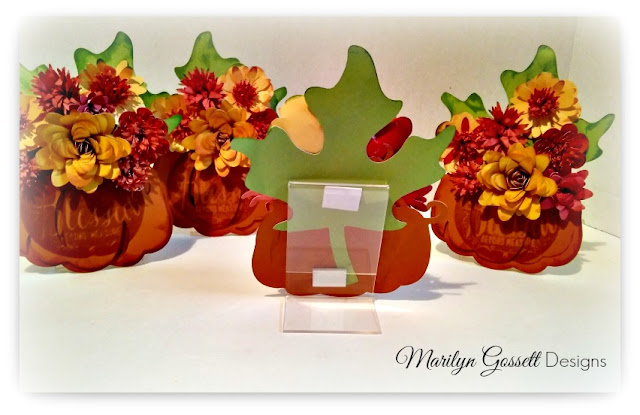
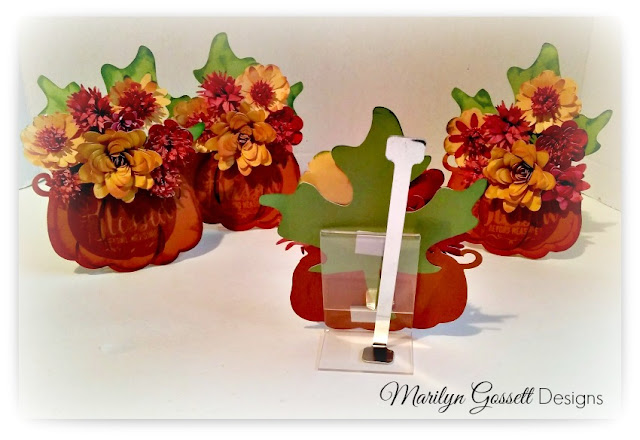
4.  Adhere the finished pumpkin to the front of the mini sign holder using 3-D adhesive.  Refer to the back view given in the photo above.


5.  Sign Dangler:  Bend one end of the sign dangler so the adhesive is facing down.  Remove the release paper and adhere to the base of the mini sign holder.  Leave the other end straight with the adhesive pointing toward the back of the pumpkin.


6.  Print and cut out a 3" square sign.  I like to use the free program PicMonkey.com to make my signage.
Remove the release paper on the end of the sign dangler and adhere the wrong side of the paper sign.
Voila!  Now you can make as many of these as you like as food identifying signs, place cards, etc.  You don't see the magic, but it is there!  I used these four as food identifiers for my meal.  


Thank you for stopping by my blog.  I always appreciate questions or comments in the area below.  I hope you got some inspiration here today and are enjoying the wonders of Fall!
Make sure to take time to enjoy the small blessings along the way, and

Live Life with a Flourish!

Marilyn


Friday, October 6, 2017

Give a little thank-you with Joy


Joy embroidered letters are perfect for just about any surface.  I used the mini Classic Monograms to make a quick thank-you card. As a bonus I used a larger monogram for a personal touch to a decorative gift bottle.
You will need:

Joy Embroidered Classic Monograms:  THANKS
Memory papers
Adhesives
Embellishments
Paper Trimmer
Instructions:

1.  Cut a 4-1/4" x 5-1/2" greeting card.  
     Striped layer:  4" x 5-1/4"
     Scalloped ovals:  4"; 3-1/2"
     Fleur de leis die cut:  1-1/2"
     Paper strip:  1/4" x5-1/2"
     Embroidered mini monograms:  THANKS
     Embellishments:  rhinestones
     
2.  Adhere the layers as shown in photo below.
3.  Assemble the card; place and adhere the letters to spell THANKS. Add the rhinestone embellishments.
4.  Add a large Joy monogram to a decorated bottle for a personalized gift.  Fill the bottle with candies, bath salts, etc.


Thanks for stopping by the blog today.  I hope you got some inspiration here.

Make sure to take time to enjoy the small blessings along the way and

Live Life with a Flourish!

Marilyn


I receive complimentary product
in exchange for my creativity on
this blog.