Showing posts with label deflecto storage. Show all posts

Thursday, March 29, 2018

Anybody Organized Challenged? Deflecto to the Rescue!


Spring is here!  Time to get organized!


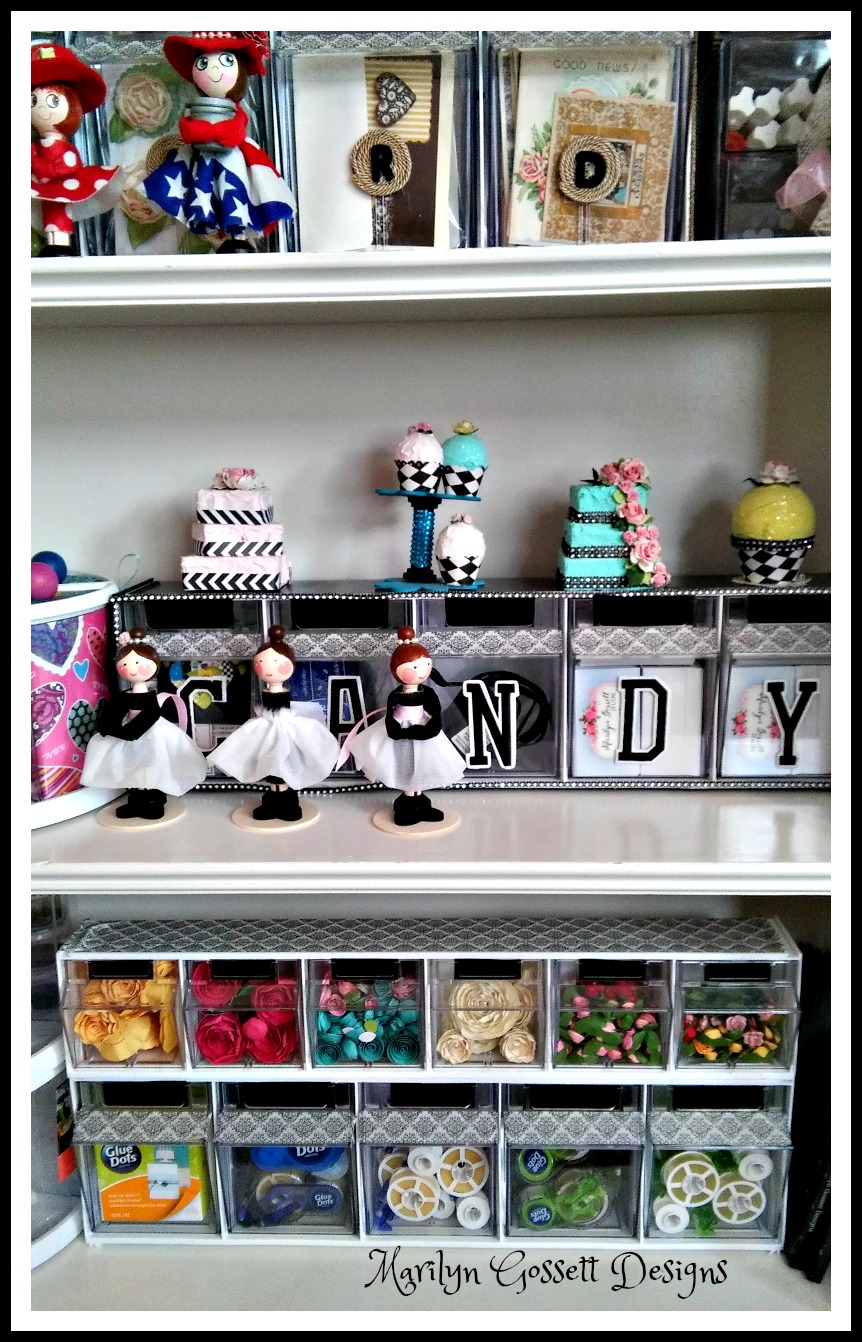
I am building my storage over time.  Your personal storage can be built around your shelving or attached to the wall.  There are brackets to hang the multi-bin storage to give you more space.  My studio is full to the brim and it will take me time to get everything under control!  I love my Deflecto storage for getting my supplies organized!

For getting your Spring cleaning started you will need:
  • Deflecto Interlocking Multi-Bin Storage Organizer:  5 Bin Unit #20503CR; 6 Bin Unit #20603CR
  • Deflecto Sign Tags with chalk pen #899112RT
  • Washi Tape:  black and white, 1" wide
  • Scissors    

Before

1.  Unwrap the interlocking bins.  Follow the instructions and attach one bin to the other.

2.  Use a white label that comes with the bins to create the black labels that can be written on with the chalk pen.  How?  Measure and mark on one black sign tag the size of tag you will need.  Cut out using a sturdy craft scissor.  Slide into the slot on the front of the bin.  Use the chalk pen to write on the black label that you made.  Repeat for each bin. *Note:  Look closely at the bottom photos and you can see my chalkboard labels.  I haven't written on them yet.

3.  Apply the washi tape in rows to the white top surface of the top unit.  Refer to the photo given below and apply tape to the ridge at the top of each bin.  Fold under or trim excess tape.

4.  Repeat for the bins on the bottom row of storage.  

After


You can find Deflecto products at Amazon and at most major craft stores.

Happy Organizing!


Thursday, February 1, 2018

Carousel Storage For Every Season!


Deflecto has so many storage options for containing and storing a huge variety of supplies!  I have used my carousels for many different things.  This one I decorated for the space I am placing it in.  I love that I have so many options with all of the beautiful memory papers and embellishments that are available.  Read on and I will show you how I did it!


You will need:

Deflecto:  9-Bin Rotating Carousel Organizer, #3901CR
cardstock:  12" coordinating colors and prints, 6 
wood:  1-1/4" ball knobs; 6; dowels or chopsticks to use as a handle for painting
acrylic paint:  six colors to match patterned papers
paintbrush
paper trimmer
pencil
scissors
adhesives
water bucket
paper towel

Directions:

1.  Cut a 5-1/2" x 12" rectangle using the paper trimmer.  Insert in one 6" tall bin.  Adjust so that the short edges come together in the V of the bin.  Repeat for the other 6" tall bins.

2.  Cut one 2-3/4" x 12" rectangle. Insert in one 3" tall bin as for the 6" tall bin.  Cut a contrasting paper and repeat for another bin.  Repeat for each bin, inserting your chosen patterned paper.


3.  Choose the paints to pair with the patterned papers.  Insert a wooden dowel in one ball knob. I use wooden disposable chop sticks.  Use as a handle and paint the wooden knob.  Place upright to dry.  Repeat for each knob.


4.  Decorate the lid:  Lay one lid top down on the wrong side of cardstock.  Use the pencil to outline the shape.  Cut out inside the pencil lines and make it fit inside the lid edges. (About 1/4") Adhere to the lid.  Repeat for each of the lids as shown in the photo given below.


5.  Adhere the painted ball knobs to the tops of the bins as shown below.  I used a stronger glue for this step.  Tacky glue will work too.


Isn't this fun?  There are so many design options for decorating these bins.  I am using these for my small wood turnings and shapes.  Let your imagination be your guide!

Take the time to enjoy the small blessings along the way and

Live Life with a Flourish!

Marilyn


Thursday, November 30, 2017

Snowman Factory with Deflecto Stackable Caddy Organizer


December Greetings Friends!  As I write this blog, I am looking around at my stacks and piles of Christmas decorations as I finish up some projects and look forward to decorating the house.  Deflecto has come up with a Stackable Caddy storage system that is a favorite of everyone!  The caddys are made to Stack'N Go with a Caddy Wheel Base.  You can pile on as many as you desire for convenient storage.

I decided to dedicate one of my caddy's to a festive storage for the snowman ornaments I make for the holidays.  I put the foam balls, paints, paintbrushes and accessories in the storage bins for convenience when I work on this project. 

Read on, and I will tell you about how I decorated the caddy!


You will need:

Deflecto:  Stackable Caddy Organizer #29003CR
Paints:  Metallic Gold Acrylics    (Designer note:  Spray paint works great too)
Sponge:  I used a sea sponge
Paintbrushes
Vinyl with adhesive:  Metallic Gold and Clear Glitter
Die-cut machine
Water Bucket
Paper Plates
Paper Towels
Scissors
Paper Trimmer

Instructions:

1.  Remove all of the clear bins from the caddy.

2.  Pour out some paint on a paper plate.  Wet the sponge and squeeze out all of the moisture.  Use a pouncing motion to apply paint to the sponge and repeat that motion as you apply the paint to the caddy.  After applying a coat of paint to the caddy, apply a second coat where needed.  **  If you want a quicker way to do this......a metallic spray paint made for plastic will work great!
3.  The caddy should look about like this when you are finished painting.
4.  Stars:  Cut 1", 3/4" and 1/2" stars from the vinyl using the die-cut machine.  Start with about 20 of each size.  Peel off the release paper of one star and adhere to one bin.  Repeat; randomly placing the stars until you are happy with the way the bins look.  

5.  Cut 6 vinyl  rectangles at 2" x 2-1/2" using the paper trimmer.  Round off the corners with the scissors.  Remove the release paper from one rectangle, position and adhere to one of the indention's on the top of a bin.  Smooth out all of the air bubbles.  If you get a stubborn air bubble; use a pin to release any trapped air.  Smooth.  Repeat and finish the other indentations.  Below is a photo of how they should look when you are finished.
Below are a couple more photos of how my caddy looks now.  I love it and I am looking forward to finishing my snowman ornaments.  I will be adding some hangers and embellishments to make them look cozy and ready for the tree.


Thank you for stopping by the blog today.  I hope you got some inspiration here today and have a wonderful Christmas season!

Cheers!
Marilyn


Tuesday, October 31, 2017

Carousel Pumpkin Decor with Deflecto


November is upon us!  The month to celebrate our many blessings with friends and family.  Deflecto provides us with many products to help us with our celebrations and feasts.  I used a Rotating Carousel Organizer to make a useful piece of decor to celebrate the season.  Read on and I will show you how!


You will need:

Deflecto:  Rotating Carousel Organizer #3900CR 6 canisters
Spray Paint:  Krylon Fusion for Plastic, Orange
Cinnamon Sticks
Cardstock:  Green, Orange, Dk. Yellow
Inkpads:  Orange, Green,  Brown
Wedge Sponges
Raffia
Craft Glue
Scissors
Die cut machine for cutting leaves

Instructions:

1.  Follow the instructions given on the paint can and paint the canisters, lids and base.
Allow to dry thoroughly.
2.  Cut the leaves.  Ink the edges.  Apply craft glue to the wrong side of the leaf and adhere to the front of one canister.  Repeat for the other canisters.
3.  Gather a bunch of the cinnamon sticks and secure with raffia.  Tie a knot to secure.  Trim raffia ends.  Place the cinnamon sticks in the top opening of the canisters.  Adhere the leaves to the cinnamon sticks and raffia as shown.  Take care to not get glue on the canister.

Here is the completed canister.  I used Deflecto mini sign holders to make the scarecrow and the crow.  The legs and arms are Deflecto Sign Danglers.

Hope you have a wonderful month of November!  Onward and forward to December! We will have much more to show you for Christmas!  Thank you for coming by! We welcome comments and questions.

Make sure to take the time to enjoy the small blessings along the way, and
Live Life with a Flourish!

Marilyn


I receive free product in exchange for
my creativity on this blog.


Sunday, June 4, 2017

Deflecto for Greeting Card Storage


I love my Deflecto storage! I can decorate it to fit with my studio decor; or wherever I decide to put it.  In this case; I am using the 4 bin tilt bin by Deflecto for my greeting card storage.  I  make my cards ahead and because I make a LOT of them, I end up having to put them away where I can't see them.  Problem solved with this tilt bin storage that is made to fit with the other sizes of tilt bin containers. The 4-1/2" x 5-1/4" cards fit nicely in the tilt-out bins.

By adding decorative burlap; some cording trim and a few other things, I upgraded my storage into a piece of decor that I will enjoy looking at.  Check out the photos below to see how to cut the burlap.


You will need:

Deflecto:  4 bin Craft Tilt Bin #20403CR
Burlap with a fleur de lei print
Trim:  1/8" beige cording (several yards)
Embroidered letters:  1" black to spell CARD
Cardstock:  Black
Pen:  White Chalk
Scissors
Tacky glue
Gluegun

Directions:

Follow the steps below to measure and cut the burlap fabric to fit the storage.

Apply using tacky glue.

Adhere the cording to the edges of the burlap using the glue gun.

Cut a piece of black cardstock to fit the slot on one bin.  Write the type of card on the paper.  Insert into the slot.  Repeat for the other bins.

Make medallions from the cording.  Apply glue to a paper circle.  Starting in the center; press the cording into the glue, making a spiral.  Adhere to the front of one bin.  Repeat for the remaining bins.

Glue the letters to the cording medallions as shown.  Now fill up your bins with all of those beautiful greeting cards you have made!


Thursday, May 4, 2017

Home Decor with Deflecto - Frame and Drawer Set

CREATE.  DISPLAY.  ENJOY....  

Deflecto products are perfect for event signage, storage, and home decor!  I consider each product a surface for creating something personal and unique!  There are so many possibilities!  I used a frame and a two drawer cube to make a fun set perfect for mom or for yourself!  I like to keep my nail polishes, hand creams, etc. next to my recliner where I relax and watch TV.  The two drawer cube is perfect for keeping small items nearby and at hand when I need them!  I also enjoy seeing the happy faces of my lovely daughter and son-in-law!


You will need:

Deflecto:  2-Drawer Cube #35010CR; Frame 8" x 10" #597901CR
Memory Papers:  12 x 12" coordinating papers from 48 sheet pad
Washi Tape:  1" wide white with gold polka dots
Adhesives
Glue Dots 
Paper Trimmer
Paper Punch:  1-1/2" round scallop
Scissors


Instructions:

1.  2-Drawer Cube:  Cut four 6" x 6" pieces from one sheet of memory paper.  Trim papers so that they fit the sides and top of the cube.  Use the Washi tape to connect the 6" squares to the cube storage.  Leave the bottom plain.

2.  Drawers:  Cut two 2-1/2" x 5-1/2" rectangles from contrasting papers to decorate the front of each drawer.  Place one rectangle on inside edge of the front of one drawer with the design facing out.  Apply a small piece of adhesive to (the right side) of each side and the bottom of the paper; then adhere the paper to the inside of the drawer.  Repeat for the second drawer.

3.  Cut two 5-1/4" x 5-3/4" pieces from a 3rd contrasting paper.  Place one piece in the bottom of one drawer; right side facing up.  Repeat for the second drawer.

4.  Embellish:  1" Paper Roses:   Choose a contrasting paper to make two spiral roses.  Cut a 4" circle from chosen paper.  Cut into a spiral.  Roll into a flower and adhere the top of the flower to the base.  It is an option to purchase paper flowers from the craft store.  I punched out a 1-1/2" scalloped circle from green cardstock and glued one to the bottom of one rose.  Repeat for the second rose.  Adhere one rose to each drawer as shown.  I used glue dots for this step in case I want to change the flowers.

5.  8" x 10" Frame:  Choose 3 contrasting papers from the paper pad.  Cut one 8" x 10", one 6-1/2" x 8-1/2", one 6" x 8".  Center and layer the papers from large to small.  Center a 5" x 7" photo and adhere to the top layer.  Place the papers between the panels of the frame.

6.  Finish:  Apply Washi tape to the top and bottom corners of the frame as shown.  Enjoy!


Thank you for stopping by the blog.  I hope you got some inspiration here today!

Take time to enjoy the small blessings along the way and,

Live Life with a Flourish!

Marilyn


I receive complementary product in
exchange for my creativity on this blog.


Monday, January 2, 2017

Deflecto storage for the New Year!


 Burlap and cording trim are timeless.  They both come in a variety of patterns and colors.  Deflecto storage is wonderful for all sorts of things in the office and at home.  I am giving my vanity an update and chose several deflecto products that I love for this project!  Shown below are 2 of the storage cubes that I have stacked and attached together with the metal connector that comes with each cube.  The cubes can be arranged as side by side or stacking.  I am using the deflecto X-Divider Cube to hold cosmetic brushes and the like.  Pencils, anything that lies flat can go in these compartments.


The Interlocking Storage Organizer comes with two lids or six lids that come apart or stack.  I have taken these apart and I am using them as containers for cotton balls, cotton swabs and wedge sponges.  


Pictured below are the components for the storage compartment that I created.  Read on, to the next set of photos and I will show you how to cut the burlap.

You will need:

deflecto:  4-Drawer Cube #350301CR; X-Divider Cube #350201; interlocking storage organizer with 6 lids #20101CR
Joy embroidered letters:  1-1/2" Monogram black  (I used my initials)  http://joysa.com/
cording trim:  beige in 1/8" and 1/4"  (several yards of each)  http://www.decorativetrimmings.com/
Mod Podge:  matte with brush  https://www.plaidonline.com/default.aspx
burlap with fleur de lis pattern
scissors
adhesives:  glue gun; tacky glue


Instructions:

1.  Measure for the width and length that you want to cut your fabric.  The cubes are 6" x 6".  I measured and cut a 6" x 30" piece for the sides and the top.  The back pieces were measured and cut in 6" squares with the patterns matching up before adhering to the storage containers.

2.  Find a string in the burlap and pull it the length of the piece you will be cutting.  Pull the string all the way out without breaking it.  If the string breaks, cut up to the place the string broke off and continue pulling the same string.  This will give you the guide you need to cut the burlap straight and not get fraying.
3.  Below is a photo of the burlap being cut along the guide line.  This is a sure-fire way to cut your burlap and be happy with the results!  Designer tip:  If you are cutting individual pieces for a placemat or the like; pull and remove the strings around each side to create a fringe.


4.  I applied Matte Mod Podge to the surface of the storage bins and to the wrong side of the burlap.  Make sure to cover your surface with wax paper or freezer paper before moving on with this step.  Adhere the burlap to the top and sides of the containers.  Then; finish by adhering the squares to the back.  I left the bottom without fabric.

5.  Use a glue gun (or whatever works best for you), to adhere the cording trim to the edges of the container as shown.  

6.  Cording Medallions:  Create the cording medallions by pinching one end of the cording together and gluing to a scrap of burlap.  Continue by creating a spiral; gluing as you go; until you have the size that you desire.  Cut the medallion out; concealing the burlap edges.  Repeat for each medallion.  Adhere to the storage container as shown.

7.  For the storage containers:  Separate into 3 containers with lids.  Follow the instructions for the cording medallions and create a medallion for the inside of the top lid of each container.  Adhere the monogram letters to the medallion inside each lid. Adhere cording around the outside edges; top and bottom of one container. Make sure not to interfere with the interlocking portion of the container.  Repeat for the others.  Finish:  Apply medallion to the front of the cube storage and adhere a monogram letter.  Enjoy!

Deflecto has your New Year's Resolutions covered!  We all aspire to clean up our clutter and make the new year bright, right??  Deflecto can be found in various craft stores and on Amazon.  Check out the link given to peruse the products that are offered.

Thank you for checking out my blog today.  I hope you have a wonderful year ahead....take time to enjoy the small blessings along the way; and...

Live Life with a Flourish!

Marilyn


I have rec'd free product from the companies mentioned in this blog
for sharing my creativity.  <3