Showing posts with label etchall etching creme. Show all posts

Monday, March 13, 2017

Celebrate Spring with Etchall(R)!


Etchall(R); a little paint and some embellishments will take an inexpensive glass container to new heights!  I will show you how I transformed an apothecary jar and a glass bottle into gifts I would give or keep as home decor.


Materials:


Etchall(R):  etching creme; dip 'n etch liquid; "Love you a Latte" stencil; Detail Pick Tool;  Squeegee
Glass:  apothecary jar; heart shaped bottle with cork lid

Paint:  Multi-surface acrylic - Teal

Sponge
Ribbon
bunch of silk flowers
mulberry or paper flowers
scissors
painters tape or masking tape
plastic container for dipping

Adhesives

Instructions:

** Before you start:  You will be re-using the etchall(R) creme and liquid.  Do not throw it away!  It is good for many uses even if it starts turning brown as it has in the photos shown here.  I will use it for as long as it keeps etching.

1.  Dipping in etchall:  Cut the top off of a disposable plastic container.  The smaller size; the better.  It has to be large enough for the piece to fit.  We are dipping the apothecary lid.

2.  Put the item you will be dipping in the plastic container.  Fill with water to cover the lid.  Use a marker to draw a line on the bottle at the top of the water line.  This will show you how much etchall you will need.

3.  Dump out the water and fill the bottle to the marker line.  Place the glass lid in the liquid and set the timer for 15 minutes.  15 minutes is the standard amount of time you will use when etching with etchall(R).

4.  When the time is up; remove the lid from the etchall liquid.  Rinse & dry thoroughly.  

5.  Pour the etchall(R) liquid back into it's original container.  It will be good to go for another project!  I used the dip 'n etch to etch the heart shaped bottle using the same instructions.

6.  Now it is time for the Etchall(R) Creme.  If this is the first time you have used an etchall(r) stencil, I recommend watching an instruction video with Barbee which you will find here:  http://etchall.com/getting-started/

7.  Follow the instructions given and apply the stencil to the jar.  Use the Pick Tool to remove the pieces of the stencil that will make the design on the glass.  Make sure to leave the stencil in the places that give definition to the design.

8.  Follow the instructions given to apply the stencil to the front of the jar.  After picking out the pieces that you won't need; use the Squeegee to remove any air bubbles and to seal all of the edges.  Further prepare by applying tape around the stencil so that the etchall creme won't slide down the sides of the jar.  

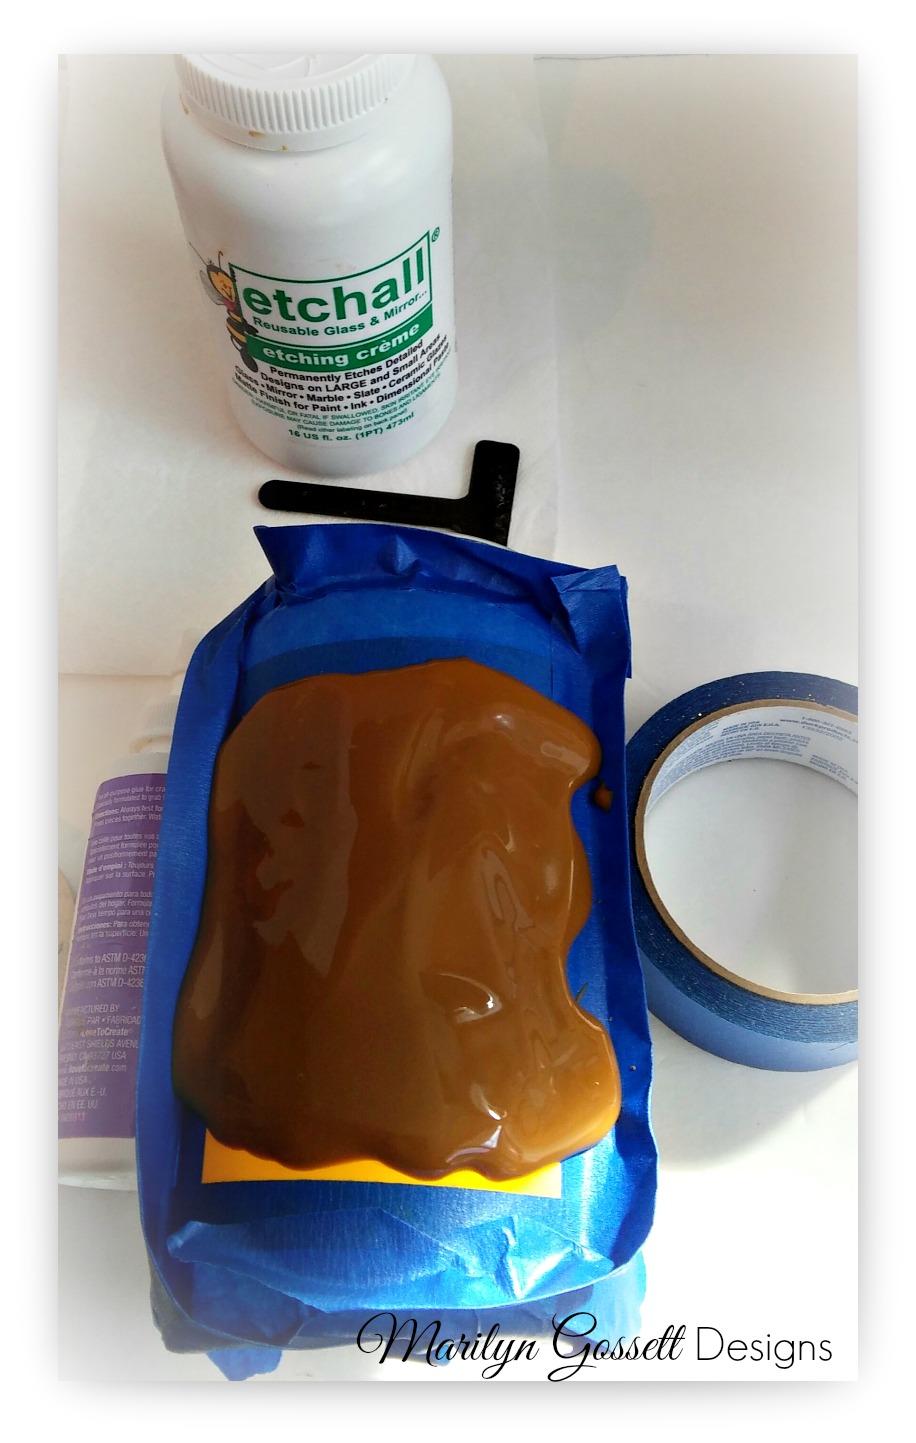
9.  Apply a thick layer of etchall creme to the top of the stencil and lightly spread to cover the stencil.  Set the timer for 15 minutes.

10.  The magic!  When the time is up, use the Squeegee to remove as much as you can of the creme and return it to the original container.  As with the liquid, the creme will turn brown over time and multiple uses; but it will still etch!  Once the creme is put back in the container; rinse the jar under warm water, removing the tape and the stencil.  Once it is clean; give it a good dry and see how pretty the design looks!


11.  Once the lid is dry; paint it with the sponge using a pouncing motion.  Apply another coat as needed.  Allow to dry thoroughly before inserting into the top of the jar.


12.  Embellish!  Tie the ribbon around the neck of the jar.  Finish by adhering a pretty flower to the ribbon.  Trim a V in the ends of the ribbon.


I hope you got some inspiration here today.  

Make sure to take time to enjoy the small blessings along the way and,

Live Life with a Flourish!

Marilyn


I receive complementary product in
exchange for my creativity on this blog.


Monday, August 15, 2016

Monogrammed Mirror and Jar Decor with etchall(R)

Gather a recycled jar with lid; a soda bottle with the top cut off and dip'n'etch liquid.  You will need a beveled edge mirror and a 4" square mirror for the center.  I purchased a wooden painted easel and painted over it with a color that I chose for my theme.
You will need:

etchall (R):  dip n' etch liquid; etchall creme, squeegee; etchall(R); etchmask Stencil ComboPak
die cutting machine 
Multi-Surface FolkArt piant by Plaid(R)
Tacky Glue
Embellishments:
Cording; 1 yard gold
Flowers; 1" pink mulberry paper
Corners:  gold filigree, 2
Pearls:  singles cut from pearlstring strand
scissors
paintbrush
water bucket
paper towels

Instructions:

1.  Follow the instructions given and attach the etchall transfer sheets to the etchall etchmask.  Cut the strips the size you want for applying stripes to the jar.  I cut them 1/2" x 4".  Cut enough to fit around the jar.

2.  Remove the release paper and apply evenly to the jar.  Use the squeegee to remove all and any air bubbles; then remove the transfer paper from the top of the etchmask.  

3.  Pour water into the soda bottle and insert the prepared jar.  Remove the jar and mark where the water line should be to prevent over-pouring.  Fill the soda bottle up to the marked line with etchall (R) dip 'n etch.
Fill the jar with water for added weight and place inside the soda bottle.  The etching liquid should come up to the top of the jar.  Set the timer for at least 15 minutes.  

4.  Remove the jar from the soda bottle.  Take care to pour the dip 'n etch back into the original bottle.  You can use it again!  Pour the water from the jar and rinse and dry it thoroughly.  Set it aside for now.


5.  Paint the lid with the Multi-Surface paint.  Allow to dry.  While the paint is out; paint the easel to match if you would like to change the color.

6.  For the beveled mirror:  Set the 4: square mirror in the center of the top of the larger mirror.  Use a pen or pencil to trace around the mirror.  Cut the strips to fit from the outer edges of the mirror into the marked line.  Remove the release paper from one strip of etchmask and attach it to the mirror.  Repeat with the remaining strips; spacing them evenly as shown.  Cut four 3/4" squares from the etchmask and adhere one to each corner of the mirror.  Use the squeegee to remove air bubbles; then remove the transfer paper from the etchmask.

7.  Lay the mirror on a flat surface and apply the etchall creme as directed by the manufacturer.  Set the timer for at least 15 minutes.  When time is up; place the creme back into the original container.  Rinse and dry the mirror thoroughly.  There is a great training video on the website if you have not etched before.  Here is the link:  http://etchall.com/getting-started/

8.  Die-cut the monogram and apply to the smaller mirror.  Repeat the process with the etching creme.  Remove the etchmask; rinse and dry the mirror.


9.  Use X-treme hold adhesive tabs to attach the monogrammed mirror to the center of the larger mirror. I used Tombow brand.


10:  To finish:  Adhere the cording one side at a time using the tacky glue.  Adhere cording around the neck and to the top of the jar.  I decorated the lid further with a 3" round mirror and glued the cording around the mirror.  Adhere the filigree corners to the bottom of the mirror and the flowers to the upper left hand corner.
You can make this your own by embellishing with your colors of choice.  I love finding recycled glass items to etch.  The thrift stores are a great place to start; but the craft store has much to offer as well!


On a personal note:  I will be taking these up to my mother's memorial service this next week-end.  She suffered for years with a mind robbing disease called Alzheimer's.  We are asking family and friends to donate toward the Alzheimer's foundation in lieu of flowers and the jar will be for people who donate at the site.  I will miss my mother; but we know she is in a much better place and free from a world that she no longer recognized.  

I hope you got some inspiration here today.....and I like getting comments if you would like to leave one.  Maybe you have a question.

Make sure to take time to enjoy the small blessings along the way and;

Live Life with a Flourish!

Marilyn


I receive a small stipend & free
product in exchange for sharing 
my creativity.


Monday, December 28, 2015

Dress up a Vintage Pyrex Dish with etchall creme!


Have you ever tried etching?  It can look a little intimidating if you haven't.  I use a product called etchall and it is fun and easy to use. The main ingredient is a glass project to finish and I enjoy searching for vintage pieces to etch.

Before you start; I highly recommend watching the video provided by Barbee at http://etchall.com/


Do you like to give food dishes to people and not have to worry about getting the dish back?  I love going to second hand stores.  Sometimes you will get lucky and find a "vintage" dish.  I almost always find something special.  I can then personalize the dish in some way and give it away with a gift of food in it.  Bottles, beverage containers and drinking glasses can be great finds too.

Here is a picture of the dish that I found.  Do you remember the Pyrex with the snowflake design? The color is popular again too!

The pictures to follow are to show how I etched the lid of the dish.

You will need:

Casserole dish with glass lid
etchallR etching creme
etchmaskR stencil combo pack
Tool:  etchall squeegee

painter's tape
Cricut or other cutting machine
cartridge or die for letters
scissors


*Note:  Figure out the size and shape you will need before you cut out the etchmask and transfer paper.
I used 1" letters and cut out each word separately on my Cricut machine.


1.  Apply the stencil paper to the etchmask only using the amount you will need for your project.  Cut out the word "GOOD".  Trim with scissors and apply to the glass lid.  Repeat; cutting out the word "EATS".  Apply to the glass lid as shown.  Use the squeegee tool to get out all of the air bubbles.

2.  Apply painters' tape around the stencil.  This is to prevent any of the etching creme to get on the glass.
3. Apply the etching creme and use the squeegee tool to spread it out over the stencil.  Be generous; but don't get any of the creme on the glass outside the tape.
4.  Set the timer for 15 minutes.  Remove the creme when the time is up and put it back into the jar. The etching creme is good to use over and over.  Take the glass to the sink and rinse with water; then remove all of the stencil and tape and wash & dry the dish thoroughly.

For the sake of the photograph below; I filled the dish with celery and carrots.  While these are good for you; I am thinking more about filling it with something a little more fattening before I give it as a gift.

I hope you got some inspiration to start etching!  I will be looking for new projects and sharing my new ideas on this blog.

I hope you are enjoying this holiday season.  The new year will be arriving in a couple of days!

Make sure to take time to enjoy the small blessings along the way and;

Live Life with a Flourish!

Marilyn


I have rec'd moderate compensation 
for this blog post.  :-)