Showing posts with label DIY. Show all posts

Thursday, June 23, 2016

Decorate the Office with Deflecto!


Have you heard of Deflecto?  There is a good chance that you haven't heard the name, but there is also a good chance that you have used the products they manufacture! 

The frame, four drawer cube and nameplate are shown below.  The frame is acrylic with a black border, the storage cube is clear, and the nameplate comes in silver and black.  I have customized each one to fit with my design studio and I show how I did it below.


Nameplate is decorated with washi tape, rhinestone flourish, paper flower and pearl cabachon.
The faux rhinestone trim comes on a roll and has a self-adhesive back.
The frame is decorated with the same supplies as the nameplate.  Washi tape across the top and bottom; the rhinestone flourishes and self-adhesive trim.  To complete the graphics for my nameplate and for the frame, I went to the free online SignCreatorat deflecto.com/signcreator.  This makes it easy and fun.
I put a removeable cover on the four drawer cube that is made out of cardstock and held together with washi tape.  I further embellished it with self-adhesive faux rhinestone trim. (I got it at Michaels one of the dollar bins).
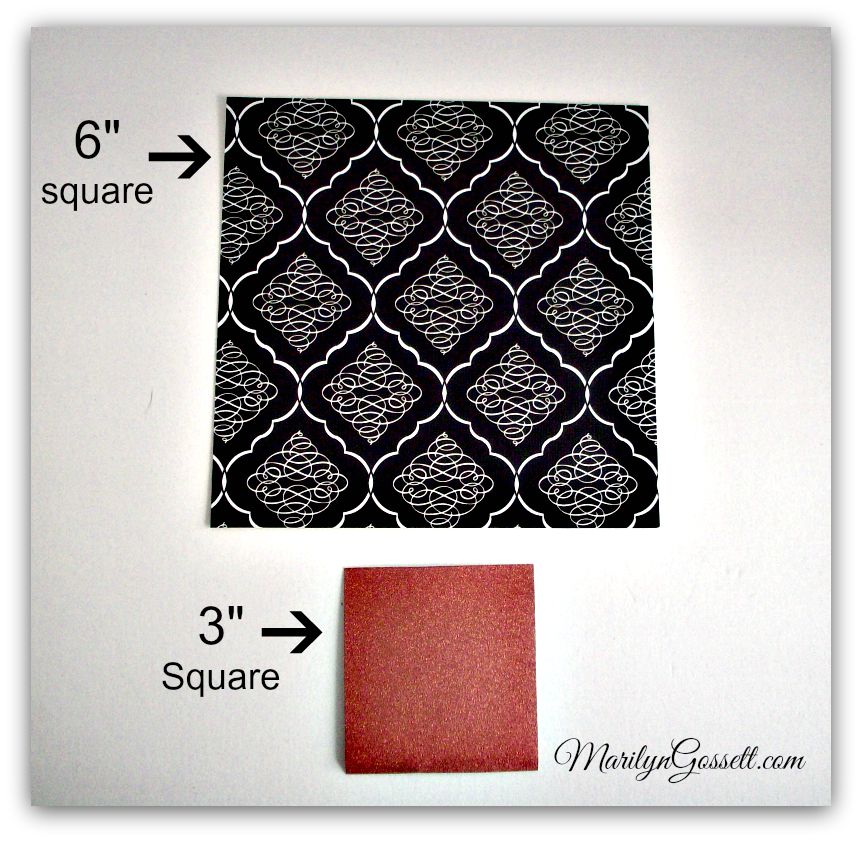
Cut four 6" squares from one 12" piece of patterned cardstock.  Make sure the pattern on the paper is going in the right direction, matching up the pattern as well as possible.  Refer to photos below to see how they are put together.

Place the assembled cardstock cover over the cube.  Apply washi tape on the back side seams to secure. Decorate with the faux rhinestone self-adhesive trim.  Here is how it looks after you attach the papers to the cube.  You can change it up if you want to!


Hope you got a little inspiration here today. 

.


Make sure to take time to enjoy the small blessings along the way; and
Life Life with a Flourish!

Marilyn


Thursday, May 19, 2016

A "perfect-o" Deflecto DIY wedding!


joy embroidered letters wedding table marker


Weddings are a joyous occasion! We have a wedding coming up this summer and I am busy helping with DIY projects to decorate the venue.

Last month I blogged about the table markers that I created with the Joy embroidered letters. I have completed the table marker project with this beauty that will sit at the head table with the bride and groom.

To create this sign you will need the following:

  • Joy embroidered letters, spelling Mr. and Mrs. with the last name
  • 12" acrylic sign holder (by Deflecto)
  • Cardstock - black/white stripe, plus solid black, teal, green
  • Gold glitter cardstock
  • Pearl beads, star embellishment
  • Paper trimmer, scissors, adhesive
  • Self-adhesive faux rhinestone trim
  • Die-cutting machine with die-cut for scalloped ovals
  • Paper flowers

Instructions:

To make hand-rolled paper flowers, cut cardstock into various sized circles 2" - 4" in diameter - they don't have to be perfect. Cut each circle into a 3/8" spiral. Leave a little circle in the middle. Roll the spiral into the form of a rose. Use a hot glue gun to secure the rolled spiral at the bottom. I use my fingers and thumbnail to distress the edges of the rose.


Cut out leaves by hand or with a die-cutting machine. If you cut out a heart from a folded sheet, then cut the heart in half along the fold, you can more easily shape each half into a leaf.

Cut the striped cardstock to fit the size of the acrylic sign holder, then trim black and teal sheets to fit behind the couple's last name. Layer and adhere these background papers together and slide into the sign holder.

Die-cut a pair of scalloped ovals from cardstock (larger black and smaller gold glitter) for each letter. Glue to the outside of the sign holder, then center and adhere each letter on top as shown. Embellish your table marker with the flowers, leaves and rhinestone trim. Glue a pearl into the center of each flower.

Spell your name in Joy letters, available at your local craft store!

Thank you for stopping by, I hope you got some inspiration here today!  Make sure to take time to enjoy the small blessings along the way and,

Live Life with a Flourish!

Marilyn