Monday, August 15, 2016

Monogrammed Mirror and Jar Decor with etchall(R)

Gather a recycled jar with lid; a soda bottle with the top cut off and dip'n'etch liquid.  You will need a beveled edge mirror and a 4" square mirror for the center.  I purchased a wooden painted easel and painted over it with a color that I chose for my theme.
You will need:

etchall (R):  dip n' etch liquid; etchall creme, squeegee; etchall(R); etchmask Stencil ComboPak
die cutting machine 
Multi-Surface FolkArt piant by Plaid(R)
Tacky Glue
Embellishments:
Cording; 1 yard gold
Flowers; 1" pink mulberry paper
Corners:  gold filigree, 2
Pearls:  singles cut from pearlstring strand
scissors
paintbrush
water bucket
paper towels

Instructions:

1.  Follow the instructions given and attach the etchall transfer sheets to the etchall etchmask.  Cut the strips the size you want for applying stripes to the jar.  I cut them 1/2" x 4".  Cut enough to fit around the jar.

2.  Remove the release paper and apply evenly to the jar.  Use the squeegee to remove all and any air bubbles; then remove the transfer paper from the top of the etchmask.  

3.  Pour water into the soda bottle and insert the prepared jar.  Remove the jar and mark where the water line should be to prevent over-pouring.  Fill the soda bottle up to the marked line with etchall (R) dip 'n etch.
Fill the jar with water for added weight and place inside the soda bottle.  The etching liquid should come up to the top of the jar.  Set the timer for at least 15 minutes.  

4.  Remove the jar from the soda bottle.  Take care to pour the dip 'n etch back into the original bottle.  You can use it again!  Pour the water from the jar and rinse and dry it thoroughly.  Set it aside for now.


5.  Paint the lid with the Multi-Surface paint.  Allow to dry.  While the paint is out; paint the easel to match if you would like to change the color.

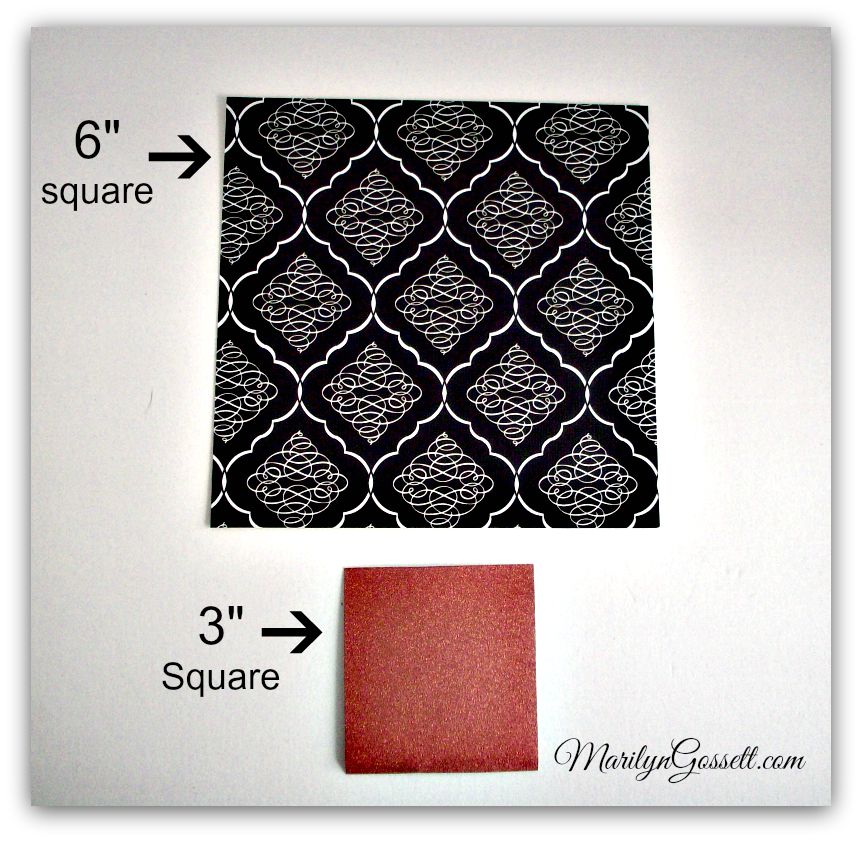
6.  For the beveled mirror:  Set the 4: square mirror in the center of the top of the larger mirror.  Use a pen or pencil to trace around the mirror.  Cut the strips to fit from the outer edges of the mirror into the marked line.  Remove the release paper from one strip of etchmask and attach it to the mirror.  Repeat with the remaining strips; spacing them evenly as shown.  Cut four 3/4" squares from the etchmask and adhere one to each corner of the mirror.  Use the squeegee to remove air bubbles; then remove the transfer paper from the etchmask.

7.  Lay the mirror on a flat surface and apply the etchall creme as directed by the manufacturer.  Set the timer for at least 15 minutes.  When time is up; place the creme back into the original container.  Rinse and dry the mirror thoroughly.  There is a great training video on the website if you have not etched before.  Here is the link:  http://etchall.com/getting-started/

8.  Die-cut the monogram and apply to the smaller mirror.  Repeat the process with the etching creme.  Remove the etchmask; rinse and dry the mirror.


9.  Use X-treme hold adhesive tabs to attach the monogrammed mirror to the center of the larger mirror. I used Tombow brand.


10:  To finish:  Adhere the cording one side at a time using the tacky glue.  Adhere cording around the neck and to the top of the jar.  I decorated the lid further with a 3" round mirror and glued the cording around the mirror.  Adhere the filigree corners to the bottom of the mirror and the flowers to the upper left hand corner.
You can make this your own by embellishing with your colors of choice.  I love finding recycled glass items to etch.  The thrift stores are a great place to start; but the craft store has much to offer as well!


On a personal note:  I will be taking these up to my mother's memorial service this next week-end.  She suffered for years with a mind robbing disease called Alzheimer's.  We are asking family and friends to donate toward the Alzheimer's foundation in lieu of flowers and the jar will be for people who donate at the site.  I will miss my mother; but we know she is in a much better place and free from a world that she no longer recognized.  

I hope you got some inspiration here today.....and I like getting comments if you would like to leave one.  Maybe you have a question.

Make sure to take time to enjoy the small blessings along the way and;

Live Life with a Flourish!

Marilyn


I receive a small stipend & free
product in exchange for sharing 
my creativity.


Tuesday, July 26, 2016

DIY T-SHIRTS FOR THE WEDDING PARTY

We have a wedding coming up this summer!  On a recent trip to the craft store; I found everything I needed for the bride's bachelorette party! 

So far, we have a shirt made for the bride and maid of honor.  Bridesmaids are to follow.  The wedding colors are black, white and teal with a touch of metallic gold.  The letters reflect the colors. These shirtsare so fun and easy to make.  I am looking forward to some great photos from the party!

You will need:

JOY embroidered letters:  1" tall pink; 2" tall white, 1" star (one for each shirt)
T-shirts in appropriate sizes (I used ladies style with a V neck)
iron 
ironing board
pressing cloth
masking tape (optional)

Instructions:

Read the instructions on the packaging for the embroidered letters before beginning your project.
Pre-wash and dry the t-shirts if needed.  

For straight letters:  Use a piece of masking tape to provide a straight line across the front of the t-shirt. Place the letters; spacing evenly.  This is the part of the project that takes the most patience.

Iron the letters in place as directed on the package.  Reverse the t-shirt and press the letters from the wrong side of the fabric.

Viola'!  You should have a very cute t-shirt for each girl in the wedding party to wear. 

 I also made bags for the girls.  Those are in another blog post.  Here is the link:  http://marilyngossettdesigns.blogspot.com/2016/05/a-bag-of-joy-for-bride.html


I hope you got some inspiration here today.  I love getting comments and questions.  You can comment below.

Make sure to take time to enjoy the small blessings along the way, and
Live Life with a Flourish!


Marilyn


*I receive a small stipend for using
Joysa products in my original design.


Flexible Pouch Garland with a Mad Hatter's Tea Party Theme


Hi everyone!  Down the rabbit hole we went for Mad Hatter's Tea Party Bridal Shower!  Above the doors that led out to the party hung a fun themed garland using deflecto's flexible pouches.  After the shower; the garland can be taken apart to make a keepsake album for the bride to be!


Papers were cut to fit inside the pouches.  I layered cut-out embellishments with photographs like for a scrapbook page and inserted it in the pouch.  I die cut scalloped circles of different sizes and cut each circle in two.  Scalloped decoration:  Adhere the paper layers together and then adhere to the top of the pouch.
The gold glitter letters are self adhesive and I adhered them to the outside of the pouch after inserting the layered papers inside the pouch.


deflecto products you will need:

Pear Clip - 20012CR
Flexible Pouch - 3" x 5" #20019CR; 5" x 7" #20020CR
Sign and Banner Hangers - #2000CR


Pear Clip  

Attach the Sign and Banner Hangers to the backs of the pouches.  Thread ribbon or jute string through the loops to hang the banner.

Hope you got some inspiration here today.  We hung this banner over the door at the bridal shower and it led out into the yard which we had decorated for the theme.  A great time was had by all!  Here is another glimpse at the decorations outside the door!


Thanks for coming down the rabbit hole with us for a glimpse into the bridal shower.  Hope you got some inspiration here today.  The wedding is coming soon and it is all DIY as well!  We are using a lot of deflecto products for wedding signage and more.  

Make sure to take time to enjoy the small blessings along the way and
Live Life with a Flourish!

Marilyn


I receive free product in exchange for my creativity.  <3

Monday, July 18, 2016

Down the Rabbit Hole for a Mad Hatter Tea Party!


I love celebrations, don't you?  I am all about jumping on an opportunity to come together with family and friends to share good times!  

We have a wedding in our family next month and the bridal shower is coming up very soon.  We decided to have a Mad Hatter Tea Party theme and I have been having so much fun making decorations and favors!  

Deflecto has a 3-tier dessert display that I love.  It is collapsible and is easy to assemble and store.  I hope you will get some inspiration here for your own celebration.  The cupcakes didn't get made in time for my post; but they will be displayed in black and white stripe cupcake baking cups.


The 3-Tier Dessert Stand comes ready to assemble with instructions.

Follow below to see how I made the fan for the display topper.
Die cut the scallop circles
Attach the finished fan with a deflecto grip clip as shown below.
Adhere glitter tape around the edges of the display shelves.


The stand has small round grooves to insert suckers or cake pops.  I tied some ribbon around the base of each sucker and adhered one to each playing card; the cards with hearts of course! I stood each sucker in the groove before adhering the card so they would be even with the platter of the display.

Ready to add cupcakes or other treats to the display!  I plan on putting nut cups and party favors on the other stands that I have.  NEXT UP!  The beveled edge frame that I used for some of the decor!

You will need a frame, a digital print-out of your choosing, and the following:
glitter trim tape
4 self-adhesive gems
key ornament with jute string hanger
self adhesive faux rhinestone trim
paper trimmer
black cardstock
hat pattern - **link
glue gun
tacky glue
scissors

1.  Cut out hat pattern from black cardstock.  Assemble.
2.  Remove the hardware from the frame and set aside.
3.  Trim the print; center and insert between the panels of the frame.
4.  Reattach the hardware with the large pegs at the bottom of the frame and the shorter ones at the top.
5.  Adhere the gems to the front of the hardware pegs; top and bottom.
6.  Adhere the glitter tape around the edges of the print as shown.
7.  Hang the key ornament off of the top right of the frame.
8.  Adhere the rhinestone trim to the crown of the hat.  Adhere the hat to the corner of the frame as shown.

You can find out where to purchase deflecto storage and craft projects at the following website:


Make sure to take time to enjoy the small blessings along the way and
Live Life with a Flourish!

Cheers!
Marilyn


**Pattern for Mad Hatter Hat


Copy and paste the pattern into a document and re-size it to fill up the page.  Leave 1/4" borders.
         Print out.


Saturday, June 25, 2016

VINTAGE WINDOWS + ETCHING CREME = FAMILY HEIRLOOMS


.

Have you ever tried etching?  Here is a fixer-upper DIY project you might enjoy.  Vintage windows have been very popular the past few years.  I like them as much as anybody, but wasn't sure what I would do with them when I got home.  I decided to make my windows into family heirlooms that would grace our family room wall. 


I started with the larger window and etched the letters.  This project took a while where the smaller window that I am showing here today was much easier.  I blocked off the letters and etched all around them.  Read below to see how I did it!


I etched the smaller window with the word "FAMILY".  
You will need:

vintage window
etchallRetching creme   http://etchall.com/store/products/etchall-etching-creme
etchallR etchmask and etchmask transfer sheets  http://etchall.com/etchmask/
etchallR tools:  Squeegee  http://etchall.com/store/products/etchall-squeegee/
                     Detail Pick  http://etchall.com/store/products/etchall-detail-pick-tool/
painters Tape
die cut machine
alphabet letters cartridge
cardstock (for die-cutting sample letters)
spray bottle with water, paper towels, old hand towel

Here is the window before I used the etchallR  on it. It sure took me a long time to finally get it done, even though it has been hanging on the wall!  The blank window probably posed a question for company; but they were all too polite to ask!  I chose not to paint over the old paint on the frame.  I may change my mind one day, but for now I am leaving the original paint for an authentic vintage aesthetic!

Instructions:

1.  Clean and dry the glass surface thoroughly.

2.  Cut letters out of cardstock first to make sure you get the right size.  I cut a 4" F and the other letters are
      3".  I spaced the letters the way I wanted them and put a small piece of painter's tape below each letter         to mark where the bottom of the letter should sit when I adhere the etchmask letters.
 3.  Once you figure out the right size; you will cut out the etchmask with the etchmask transfer paper           attached to it.  If this is your first time using it; I would suggest going to the website and watching a video showing how you use the product.  Here is the link:  http://etchall.com/getting-started/
4.  Adhere the etchmask transfer paper to the etchmask and cut out the letters with the die-cut machine.  Adhere each letter to the glass above the painter's tape as shown.  Use the Squeegee to remove all of the air bubbles between the glass and etchmask.  Use the detail pick tool to remove the transfer paper from the top of the etchmask, leaving the etchmask firmly in place.

5.  Now comes the fun part.  Carefully pour out the etching creme over the entire surface of the glass.  Spread it using the squeegee and do not press down.  Spread the creme as though you were frosting a cake and make sure it is a thick layer.  Set the timer for 15 to 20 minutes.

6.  Make sure you have a spray bottle of water and paper towels handy.  I also used a soft hand towel.
When the time is up, carefully scoop up the etching creme with the squeegee and return it to the etchall creme bottle.  It will be "good to go" for more uses.  The creme will turn a dark brown color eventually; but it will still work.  

7.  Once all of the creme is back in the bottle; spray the surface with water and clean up with paper towels.  Remove all of the etchmask letters.  Continue cleaning the surface of the glass to remove any residue.  Dry thoroughly. I used the hand towel to make the surface nice and shiny.

8.  Attach a wire to the back of the window to hang.  The windows are fairly heavy so I used a molly toggle bolts to hang it on the wall.  Enjoy your masterpiece!

Oh!  I had a little helper today.  The kitty is always looking for a sweet spot to take a nap in....or maybe just to sit in to give me his support!  This is the spot he found today to watch me work.  I won't tell you what happened when he decided to get down; but it was more work for me!


Thank you for stopping by today.  I appreciate getting comments and questions!  The comment boxes are below.


Make sure to take time to enjoy the small blessings along the way; and

Live Life with a Flourish!

Marilyn


Thursday, June 23, 2016

Decorate the Office with Deflecto!


Have you heard of Deflecto?  There is a good chance that you haven't heard the name, but there is also a good chance that you have used the products they manufacture! 

The frame, four drawer cube and nameplate are shown below.  The frame is acrylic with a black border, the storage cube is clear, and the nameplate comes in silver and black.  I have customized each one to fit with my design studio and I show how I did it below.


Nameplate is decorated with washi tape, rhinestone flourish, paper flower and pearl cabachon.
The faux rhinestone trim comes on a roll and has a self-adhesive back.
The frame is decorated with the same supplies as the nameplate.  Washi tape across the top and bottom; the rhinestone flourishes and self-adhesive trim.  To complete the graphics for my nameplate and for the frame, I went to the free online SignCreatorat deflecto.com/signcreator.  This makes it easy and fun.
I put a removeable cover on the four drawer cube that is made out of cardstock and held together with washi tape.  I further embellished it with self-adhesive faux rhinestone trim. (I got it at Michaels one of the dollar bins).
Cut four 6" squares from one 12" piece of patterned cardstock.  Make sure the pattern on the paper is going in the right direction, matching up the pattern as well as possible.  Refer to photos below to see how they are put together.

Place the assembled cardstock cover over the cube.  Apply washi tape on the back side seams to secure. Decorate with the faux rhinestone self-adhesive trim.  Here is how it looks after you attach the papers to the cube.  You can change it up if you want to!


Hope you got a little inspiration here today. 

.


Make sure to take time to enjoy the small blessings along the way; and
Life Life with a Flourish!

Marilyn